The Core Difference Nobody Explains Right
Wood filler vs wood putty for woodworking has gotten complicated with all the confusion flying around. I spent three years watching friends grab the wrong product from the hardware store, sand it to dust, curse under their breath, and start over. The problem? They sound interchangeable. They’re not.
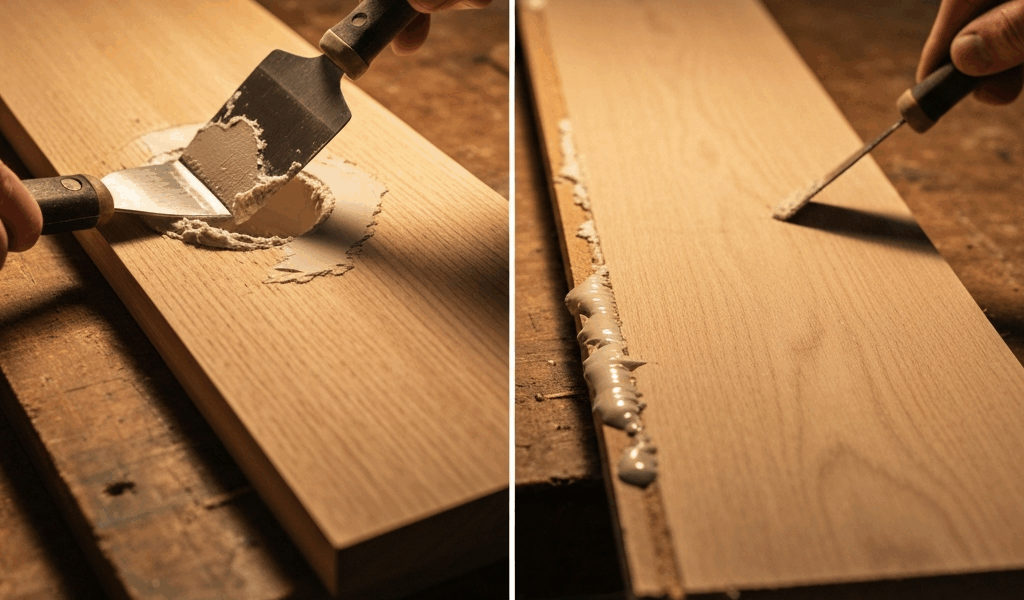
Think of wood filler like concrete for masonry — it’s structural. It’s designed to bulk up a void, handle weight, and provide a stable base for finishing. Wood filler contains wood dust, sawdust, or other fibrous material suspended in a binder. When it dries, it hardens completely and shrinks predictably — usually 5–15% depending on the brand and depth. DAP Plastic Wood (one of the most common brands at $6–8 per can) shrinks noticeable enough that you need to overfill and sand flat. That shrinkage isn’t a bug, it’s actually why you need to plan for it.
Wood putty, by contrast, is cosmetic spackle. It’s softer, stays pliable longer, and doesn’t shrink the way filler does. Most putties contain linseed oil, mineral spirits, and pigments rather than structural materials. A container of Minwax Wood Putty ($5–7) sits on the surface more like a cosmetic patch. It’s designed to hide, not to support. But it’s much more than that.
The reason most beginners pick wrong is simple: both come in similar tubes or cans, both are brown-ish, and both promise to “fill wood.” Using putty on a structural gap that needs to hold weight or take stain? Like using caulk to fill a pothole. Using filler on a pre-finished cabinet door? Like painting over cosmetic damage with concrete. That’s what makes understanding the difference endearing to us woodworkers — it saves hours of frustration.
When to Use Wood Filler Instead
Faced with a deep crack in a table leg? Filler territory. Probably should have opened with this section, honestly — structural repairs are where filler actually shines, and getting it wrong means the repair fails entirely.
Large knots create voids that demand filler. A typical knot hole in a 2×4 piece of pine can be 0.5 inches across and 1+ inch deep. Use putty here and it’ll sink as it cures, crack when you sand it, and fail when you stain. Filler hardens solid. You can overfill, sand it flat, and it’ll hold stain evenly. I repaired a walnut table leg with a quarter-sized knot void using Elmer’s Carpenter’s Wood Filler ($7 for 16 oz). Filled it proud, waited 2 hours for the initial set, sanded with 120-grit, restained the area, and the repair held for two years of regular use without budging.
Deep cracks in frame joinery demand filler too. Frustrated by seasonal wood movement and humidity shifts, a Victorian picture frame developed a 0.25-inch gap between the corner joints, I filled it using a two-part epoxy filler (like T-88 at $12–15 per kit). Structural cracks don’t just need to look right — they need to hold. Putty would compress and fail under any frame stress.
Drying time matters here. Most wood fillers need 2–4 hours before you can sand, depending on depth and humidity. Plan for 24 hours of full cure if you’re planning to stain afterward. The shrinkage is real: a filler that’s perfectly flush when wet will sand slightly concave if you’re not careful. Sand with 120-grit first, then 180-grit for smoothness. If the repair is visible and you’re staining, use a filler tinted to match the wood species. Generic brown filler shows through lighter stains like you’re hiding something.
Structural gaps in door frames, apron rails, or any joinery that sees stress? Filler. Exposed edges on plywood or MDF where you need something that won’t show grain or telegraphing? Filler. The rule: if the repair needs to be hard enough to sand flush and take finish evenly, filler is your answer.
When Wood Putty Is Actually the Better Choice
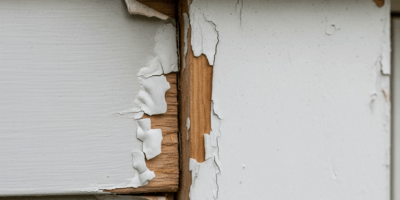
Pre-finished surfaces are where putty saves you. I made a rookie mistake years ago: a nail hole appeared in the side of a walnut cabinet that was already stained and sealed. Grabbed wood filler, filled it, sanded it smooth, and the repair sat there glowing matte against the glossy walnut like a beacon. Filler is porous. It accepts stain differently, sits slightly proud even when sanded, and shows as a distinct repair unless you’re perfect with matching and finishing. Putty stays put and blends into a sealed surface — that’s the difference that matters.
Small nail holes in finished work are the classic putty scenario. A 0.125-inch hole from a brad or finish nail in a pre-stained bookshelf? Press putty in, let it set (usually 10–30 minutes), smooth it flush, and move on. Minwax Wood Putty comes in 15+ colors. Match the wood, apply, and the repair is essentially invisible once the surrounding finish buffs back to sheen.
Surface imperfections on finished pieces — small dings, minor gouges that don’t go deep — are putty jobs. Putty won’t shrink into the void the way filler will, so a shallow cosmetic repair stays filled. Use filler here and you’ll end up with a slight depression after it dries, unable to sand without dulling the finish.
The finishing behavior is the key difference. Filler is absorbent and needs to be sealed or stained. Putty stays relatively non-absorptive and doesn’t pull stain differently from the surrounding wood. On a pre-finished cabinet door where you’re just hiding a blemish, putty wins every time. Use 320-grit sandpaper lightly to smooth if needed, but don’t aggress into the surrounding finish.
The Decision Tree Every Woodworker Needs
So, without further ado, answer these questions in order.
Question 1: Is the gap structural or cosmetic? Does it affect joinery, weight-bearing surfaces, or the integrity of the piece? If yes, jump to filler. If no, go to Question 2.
Question 2: Is the wood already finished (stained, sealed, or painted)? If yes, use putty. If no, go to Question 3.
Question 3: Will this repair be stained or painted? If it will be stained and needs to blend seamlessly, filler. If painted and less visible, either works, but filler is more forgiving for larger voids.
Question 4: How deep is the void? Deeper than 0.25 inches? Filler. Shallower? Putty can work if the piece is already finished; filler if it’s raw wood.
Most repairs fall into one of these categories. Filler for structural, raw wood, deep voids, and stained work. Putty for cosmetic, finished surfaces, and small nail holes.
Common Mistakes That Waste Time and Materials
Using filler on pre-finished pieces wastes money and creates visible repairs. You’ll sand, fill, and still see the repair after staining because the filler grain and absorption pattern don’t match the surrounding wood. I’ve seen countless examples on fine furniture forums where someone used Bondo or epoxy filler on a mahogany dresser, only to have the repair visible even after staining. Putty avoids this entirely. Don’t make my mistake.
Using putty on deep structural voids guarantees failure. The void will compress under pressure, and the putty will shrink and crack within months. A table leg with a half-inch knot hole filled with putty will start checking and failing by winter if the humidity shifts. Filler handles that scenario because it hardens fully and doesn’t compress.
Wrong grit sanding after application wastes the repair. Sand wood filler with 120-grit initially, then finish with 180-grit or higher. Going straight to 220-grit or higher clogs the grit quickly and leaves the filler fuzzy and uneven. Sand putty lightly with 320-grit if needed at all — aggressive sanding pulls it out of the void.
Overfilling shallow holes with filler creates extra work. A standard nail hole in raw pine doesn’t need a quarter-inch mound of filler to be successful. Fill flush or slightly proud, let it set fully, then sand. Overfilling means sanding forever.
Underestimating shrinkage on large fillers leads to a second fill-and-sand cycle. For anything deeper than 0.5 inches, overfill by 10–15% to account for shrinkage. Sand after the initial cure, then evaluate whether a second coat is needed. Most professionals do this as standard practice, not emergency repair.
Here’s what I’ve learned: filler is your structural workhorse for raw wood and stained projects. Putty is your cosmetic solution for finished surfaces and small imperfections. Match the material to the job, follow the drying and sanding rules, and the repair stays invisible for years. That’s it.


Stay in the loop
Get the latest craftsman charm updates delivered to your inbox.