“`html
Why Grain Raises After Staining — And Why It’s Annoying
Grain raising has gotten complicated with all the misinformation flying around. I learned about it the hard way — spent two hours getting a walnut dresser stained with Minwax Dark Walnut just right, only to run my hand across it the next morning and feel like I’d been sandpapering it overnight. The surface that felt smooth yesterday now felt like tree bark.
But what is grain raising? In essence, it’s what happens when wood fibers swell unevenly after absorbing moisture from stain. But it’s much more than that. See, stain contains moisture — even oil-based stains have solvents that penetrate wood fibers. When those fibers absorb liquid, they swell. They don’t swell evenly. The softer grain patterns swell more aggressively than the denser heartwood sections. Result? You get this washboard texture where the wood grain literally raises above the surface.
This isn’t a sign you did something wrong. It’s not a manufacturing flaw with your stain. It’s wood being wood — at least if you’re working with any species that’s actually alive on the inside.
Probably should have opened with this section, honestly. Knowing that raised grain is totally normal takes the panic out of the problem.
The Quick Fix Using 220-Grit Sandpaper
If your stain is already dry — and I mean fully dry, minimum 24 hours for oil-based stains — you can sand it smooth in about 15 minutes. That’s the honest truth.
Here’s the step-by-step approach I use:
- Wait for complete dryness. Check the stain can. Most oil-based stains need 24 hours; water-based stains dry faster but can still raise grain badly.
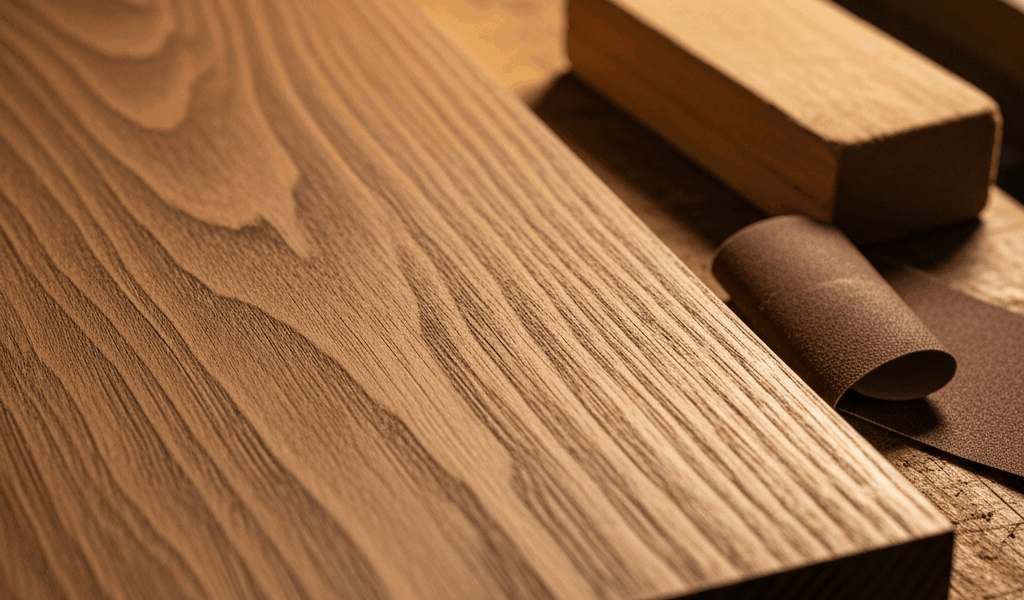
- Grab 220-grit sandpaper. This is crucial — 100-grit will cut through the stain into bare wood. 220-grit removes the raised fibers without destroying your finish.
- Sand lightly with the grain. Barely touch the surface, honestly. You’re not trying to resand the entire project — just knock down those raised fibers. Use a sanding block or palm sander at lowest speed if you have one.
- Wipe away dust with a tack cloth, not a regular rag. The tiny dust particles from sanding will stick to the stain otherwise and you’ll end up with grit embedded in your finish.
- Feel the surface. It should be smooth again. If you still feel roughness in specific areas, do another light pass.
I did this on a small oak table last month. The grain raising was visible to the naked eye — you could see raised lines where the grain patterns were prominent. Two minutes of light sanding with 220-grit flattened it completely. The stain color stayed exactly the same. No damage, no blotching.
The pressure here matters more than anything else. Use light, even pressure. You’re not trying to sand wood. You’re tickling the surface.
After sanding, you can apply your topcoat — polyurethane, lacquer, whatever you planned. The raised grain won’t come back once the final finish locks everything down.
The Better Fix Using Sanding Sealer
As someone who’s dealt with raised grain on probably thirty different projects, I learned that sanding sealer prevents the whole thing before it starts.
Sanding sealer is a thin, fast-drying primer designed specifically to seal wood before you stain. Brands like Minwax Pre-Stain Wood Conditioner and Zinsser B-I-N Primer work differently but accomplish the same goal: they create a barrier that controls how much moisture the stain can deposit into the wood.
The workflow changes slightly:
- Sand your bare wood normally with 150-grit.
- Apply sanding sealer and let it dry (usually 1-2 hours depending on the product).
- Sand again lightly with 220-grit to smooth the sealer coat.
- Apply your stain. It’ll absorb more evenly now because the wood fibers are partially sealed.
- Grain raising will be minimal or nonexistent.
I switched to this method three years ago and haven’t looked back. Yes, it adds 2-3 hours to a project because of drying time. But you eliminate the whole “rough texture after staining” problem entirely. That’s what makes sanding sealer endearing to serious finishers.
The sanding sealer also makes stain color more consistent. Since the wood absorbs more uniformly, darker stains don’t create those blotchy areas where some wood drank more finish than other areas.
Here’s the thing — you can also use sanding sealer on partially finished work. If you’ve already stained and now you’re stuck with raised grain, you could theoretically sand it smooth, apply sanding sealer, then restain. It’s a more involved fix, but it works if you need to redo a piece.
Cost-wise, a can of Minwax Pre-Stain Wood Conditioner runs about $8-12. Small price for eliminating a whole class of finishing problems.
Raising Grain Intentionally — The Walnut Trick
Some furniture makers deliberately raise the grain before staining. I know that sounds backwards.
Here’s the logic: if you wet the wood and let it dry once before staining, the grain raises, you sand it down, and then you stain. The wood has essentially already gone through its moisture panic. It won’t raise again when the stain goes on because the fibers have already experienced swelling and settled back down.
The process looks like this:
- Sand your wood normally with 150-grit.
- Wet the entire surface with distilled water using a damp sponge. Don’t soak it — just dampen it evenly.
- Let it dry completely. This takes 2-4 hours depending on humidity.
- Sand lightly with 220-grit to flatten the raised grain.
- Now apply your stain. The grain won’t raise this time.
Frustrated by unpredictable grain raising on walnut pieces, I found this technique in an old furniture restoration book from the 1970s. It’s called “raising the grain” or sometimes “the walnut trick” because it’s especially useful for walnut, which raises grain aggressively. The technique works on any species, though — oak, cherry, even pine.
The tradeoff is time. You’re adding one full drying cycle to your project. On a small box, that’s maybe 3-4 hours of waiting. On a larger piece, it’s a full afternoon. But if you want absolutely zero grain raising and you don’t want to use sanding sealer, this is the most reliable method.
Does it look like extra work? It is. But it feels like the mark of someone who knows their material.
What Not to Do — Common Mistakes
I’ve sabotaged plenty of finishes by doing these things wrong.
Don’t use 100-grit sandpaper. I made this mistake on a mahogany nightstand and immediately regretted it. 100-grit cuts through stain into bare wood underneath. You’ll create light spots where the grain was raised. Then you’ll have to restain just those areas to match, which creates obvious blotches. It’s fixable but annoying. Stick with 220-grit or finer.
Don’t sand against the grain. It splinters the wood and looks worse than the raised grain did. Always sand with the grain direction. If you’re not sure, sand in the direction that feels smoothest under your hand.
Don’t over-sand. I’m apparently aggressive when sanding, and this has gotten me into trouble. I’ve watched people sand raised grain obsessively, pressing harder and harder, until they sand right through the stain into bare wood. You need maybe 30 seconds per section. Light, quick passes. If it’s not smooth after two or three passes, you’re probably sanding too hard or using the wrong grit.
Don’t sand before the stain is completely dry. Oil-based stains especially need their full curing time. Sanding partially dried stain just smears it around and creates a gummy mess. Wait the full time the can recommends — at least if you want anything salvageable.
The most common mistake I see people make is thinking raised grain means something went wrong with the stain itself. It doesn’t. The stain is fine. The wood is just responding like wood does.
“`


Stay in the loop
Get the latest craftsman charm updates delivered to your inbox.