Why Craftsman Porch Floors Peel in the First Place
Craftsman porch floor paint peeling has gotten complicated with all the generic “just sand and repaint” advice flying around. You’ve probably already tried that. Watched it bubble and flake again before the next spring. I spent three years chasing this exact problem on my 1920s bungalow — a stubborn, drafty thing I bought for $187,000 with dreams and absolutely no idea what I was walking into. Today, I will share it all with you.
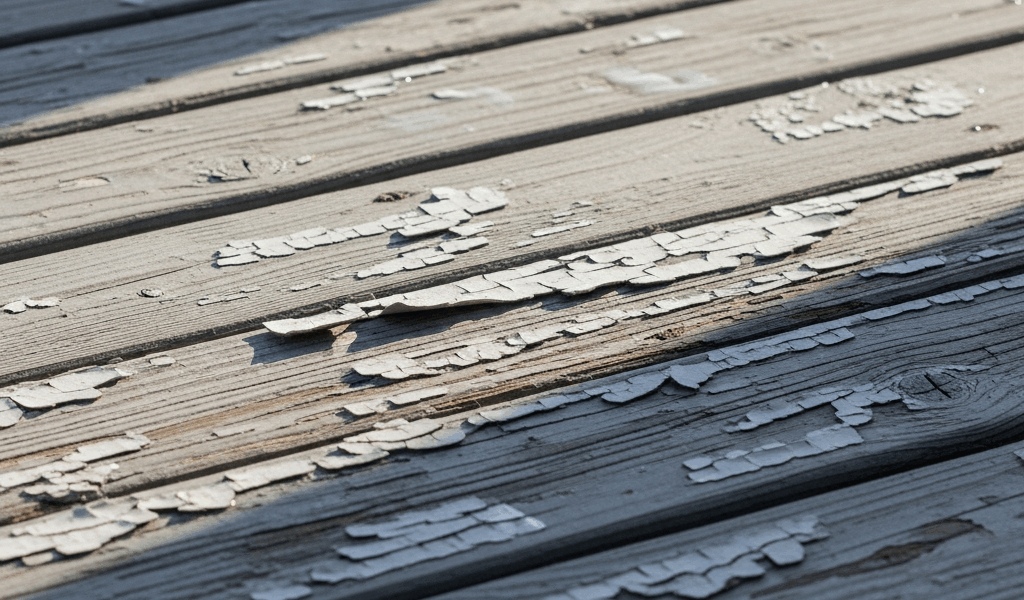
But what is a porch floor failure, really? In essence, it’s a bonding breakdown. But it’s much more than that. Porch floors fail differently than walls or ceilings because the forces attacking them are completely different. Foot traffic. Standing puddles after a hard rain. Wood that swells in July and contracts in January. Three specific culprits are responsible for most of the carnage:
- Moisture wicking upward through the wood. Older Craftsman homes sit on stone or concrete foundations that were never vapor-sealed. Water climbs into fir or pine boards from underneath and pushes the paint film right off the surface. You can repaint a hundred times. It’ll peel again. The moisture is still rising.
- Wrong paint type. Most people grab exterior wall paint from the garage shelf — whatever’s left from the siding job. That paint isn’t built for foot traffic or standing water. Too soft. It scuffs in weeks and peels by fall.
- No primer, or primer over a glossy surface. Old porch floors carry generations of paint — some glossy, some chalky, some mystery combinations. New paint doesn’t bond to gloss. It just sits there looking fine until traffic starts, and then it lifts away in sheets.
Fir and pine — the woods in almost every Craftsman porch floor built between 1905 and 1930 — move constantly with humidity changes. Paint that lacks flexibility cracks. Paint without a mechanical bond to the surface fails even faster. That’s what makes this repair endearing to us bungalow owners: it demands more than a weekend attitude.
What to Do Before You Touch a Scraper
Probably should have opened with this section, honestly. Most failed repaints fail because the diagnosis was wrong from the start.
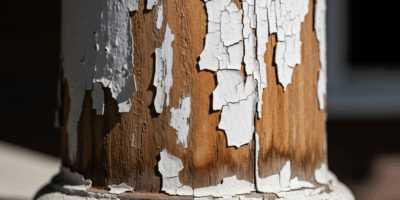
Spend an hour just looking before you strip anything. Is the topcoat lifting in large sheets? Or tiny flakes? If you can see bare wood or raw primer underneath, you have a bonding problem — primer included. If the primer is still glued tight to the wood but the topcoat is peeling, you used the wrong product or skipped a second coat. Different problems. Different fixes.
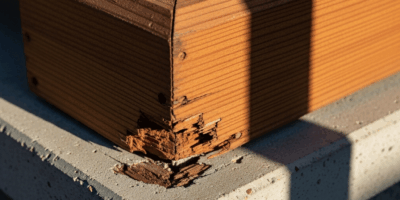
Press a screwdriver into the grain wherever paint has already peeled. Does it sink in like butter? Soft, spongy wood means rot. You cannot paint over rot. I’m apparently someone who learned this the hard way on a 14-inch section near my front step, and replacing that board first worked for me while skipping it never would have. Don’t make my mistake.
If your porch has any crawl space underneath — even just open air — go look at it. Bring a flashlight. Wet boards on the underside, water stains on the joists, mold growing anywhere — that’s your answer. Moisture wicking is the primary enemy. Bone-dry underside with peeling topside? That’s an adhesion problem, not a moisture problem. Two completely different repairs.
A moisture meter — the General Tools MMD4E runs about $25 on Amazon — is worth buying and keeping forever. Readings above 15% moisture content mean the wood is too wet to accept paint properly. I repainted my porch in August 2019 when afternoon humidity was sitting at 70%. Failed by October. The meter would have told me to wait.
How to Strip and Prep a Craftsman Porch Floor Properly
Scraping is step one. Use a floor scraper — not a putty knife, not a wall scraper. A real floor scraper has a wide blade and a long handle. The Stanley 28-108 costs around $35 and is worth every cent. Putty knives flex too much and will wreck your lower back inside an hour.
Work in broad, steady strokes with the grain. If the paint isn’t moving, you’re rushing. Move to another section and come back.
Once the loose paint is gone, sand everything. Start at 60-grit. A pole sander will save your sanity — Home Depot rents them for roughly $25 per day. Finish at 80-grit. Then vacuum the entire floor with a shop vac and a HEPA filter if you have one. Follow that with tack cloth — it’s cheesecloth treated with sticky resin that captures the fine dust a vacuum misses. A pack costs about $5 and lasts through several projects.
Now the step that actually matters: prime bare wood with oil-based primer. Not latex. Not the discount bin stuff. Oil-based primer soaks into fir and pine grain and creates a mechanical bond that latex simply cannot match. Zinsser B-I-N or Kilz Original are both reliable — one gallon covers roughly 400 square feet. Let it dry completely. Oil-based primer needs 3 to 4 hours in warm, dry conditions. I painted topcoat over slightly tacky primer once. The floor felt slick and weird for three weeks straight.
Choosing the Right Paint for a Wood Porch Floor
This is where most second attempts crater.
Exterior wall paint and porch-and-floor enamel are not interchangeable. Wall paint is built for vertical surfaces where water runs off quickly. It’s not tough enough for foot traffic — it scuffs, wears through, and peels. Porch-and-floor enamel has a harder film and higher pigment density. Built for punishment.
Two real options exist. Oil-based porch enamel — Sherwin-Williams ProClassic or Benjamin Moore Advance — builds a genuinely durable finish. Four to six years on a moderately used porch. The tradeoffs: strong fumes, mineral spirits cleanup, 16 to 24 hours between coats, and slight yellowing under intense UV over time.
Water-based alkyd hybrid — Sherwin-Williams Emerald or Benjamin Moore Natura — splits the difference nicely. Nearly as durable as oil-based, dries in 3 to 4 hours between coats, cleans up with water, and doesn’t smell like an industrial facility. Costs $10 to $15 more per gallon. I’m apparently a water-based alkyd person, and Emerald works for me while straight oil-based never quite did — the yellowing bothered me on a gray floor.
Plan on two gallons minimum for a typical 200-square-foot porch. One gallon covers 100 to 120 square feet when applied properly — not the 400 square feet the can sometimes suggests.
Application and the Mistakes That Cause Early Failure
First coat goes on thin. That word — thin — is doing a lot of work in this sentence. Thick first coats dry unevenly and trap solvents underneath, which causes adhesion failure before summer ends. Use a quality brush, not a cheap foam roller. A $12 Wooster Shortcut outperforms a $3 throwaway by a margin that will genuinely surprise you. Work with the grain whenever the layout allows.
Second coat goes on full-bodied and even. Two thin coats always beat one thick coat. Wait the full recommended dry time between coats. Read the can. Don’t guess.
Here’s a mundane detail that matters more than you’d think: plan your application so you finish nearest the door. Paint yourself into a corner — literally — and you’re either stepping on wet paint or waiting hours to leave your own porch. That messes with your timeline and your patience.
Conditions matter enormously. No direct sun. No temperatures below 50°F or above 85°F. No humidity above 85%. Early morning or late afternoon on a clear, mild day is ideal. These aren’t suggestions — they’re the difference between paint that lasts and paint that doesn’t.
Light foot traffic is safe after about 24 hours for water-based products. Forty-eight hours for oil-based. Full furniture, heavy use, cleaning — wait a full week. It feels like forever. Do it anyway.
One honest truth: even a perfect porch paint job may want a light recoat somewhere around the 3 to 4 year mark on a hard-use floor. That’s not failure. That’s what horizontal surfaces do — they absorb punishment that walls never see. So, without further ado, plan accordingly. The porch isn’t going anywhere.

Stay in the loop
Get the latest craftsman charm updates delivered to your inbox.