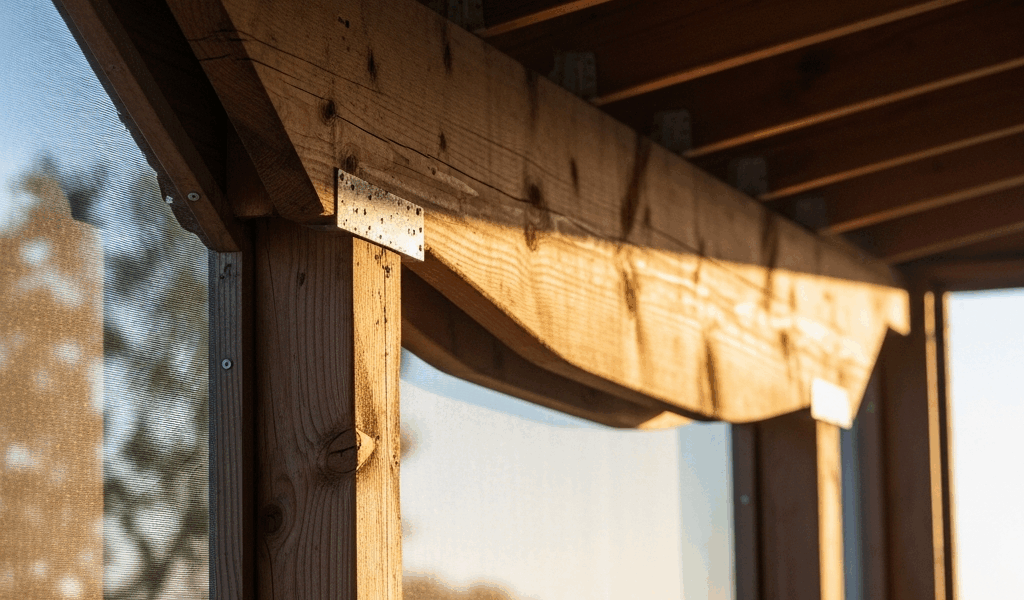
How to Tell if Your Porch Beam Sag is Structural or Cosmetic
I found out my porch beam was sagging on a Tuesday morning when my wife mentioned the doorframe looked slightly off. We’re talking maybe half an inch of visible deflection — barely noticeable unless you knew where to look. The real question wasn’t whether the beam had moved. It had. The question was whether we needed to panic or just monitor it.
Start with a visual inspection checklist. Stand inside the house and look at the gap between the top of the doorway and the header. Is it consistent? Next, check for hairline cracks in drywall above any doors or windows that lead to the porch. These settle-pattern cracks run at 45-degree angles and indicate movement. Look for uneven gaps between the beam and ceiling joists — if one side is noticeably higher than the other, that’s active settling or failure.
Do doors stick? Specifically, the ones closest to that porch. A swollen door frame suggests the structure above is pushing down unevenly. Get a 4-foot level and place it on top of the porch beam itself, not on the floor. Check the deflection. Write down the measurement.
Here’s the critical distinction: normal settling happens slowly over decades. We’re talking a quarter-inch to a half-inch total, and it stops. Active failure shows signs of ongoing movement. Cracks that have grown since you last noticed them. Visible deflection that increases month to month. Wood that feels soft when you press a screwdriver into it near the sag point.
Probably should have opened with this section, honestly — because if you see any of these flags, stop investigating and call someone: sagging greater than 1 inch, multiple cracks radiating from a central point, soft or spongy wood (rot), or sagging that extends into the main house beam structure rather than staying contained to the porch.
Temporary Stabilization Before Permanent Repair
If your inspection suggests settling rather than failure, temporary stabilization buys you time to plan repairs properly. This is not a fix. Repeat that. What you’re doing here is preventing further movement while you figure out the permanent solution.
You’ll need adjustable posts — also called screw jacks or hydraulic bottle jacks rated for structural work. A 10-ton capacity jack costs between $60 and $150. For a typical porch beam, you’ll need two posts positioned directly under the beam, spaced about 4 to 6 feet apart, centered on the sagging section. Place solid wooden blocks — 4×4 lumber works — under the jack and under the beam itself to distribute load.
The critical safety rule: never adjust jacks more than one-eighth inch per week. I see homeowners wanting to fix this in a weekend, cranking the jack aggressively. That’s how you crack drywall throughout the house and potentially damage the beam itself. The structure has settled into a bent position. You’re gradually asking it to return to neutral. That takes patience.
Install jacks in sequence. Crank the first one one-eighth inch. Wait three days. Check for new cracks or sounds. Then adjust the second jack one-eighth inch. Alternate back and forth. As you raise the beam, watch for warning signs: loud cracking sounds — not settling sounds, actual sharp cracks — doors jamming suddenly, new gaps appearing in walls. Any of these means you’ve moved too fast. Back off, let things settle for a week, then resume at a slower pace.
Measure the actual lift using a dial indicator or simply marking the jacks with a marker and photographing the marks weekly. Most homeowners find that after lifting a half-inch to three-quarters of an inch, the structure stabilizes and stops moving. That’s your new equilibrium.
Once stabilized, permanently brace those posts with adjustable columns (permanent installation) or plan your permanent repair while the beam is locked in this neutral position.
Permanent Repair Options for Homeowners
Three main approaches exist. Each works for different severity levels and skill sets.
Sister Beaming — The Moderate Option
This involves bolting a new piece of lumber directly alongside the sagging beam. Essentially, you’re doubling the structural capacity. If your beam is a 2×8 and you install a matching 2×8 bolted to it with half-inch bolts every 16 inches, you’ve created a composite beam roughly twice as stiff.
You’ll need the old beam jacked up slightly to relieve load before bolting. The new lumber must be the same species and grade — pressure-treated for new porch beams is standard. Pressure-treated #2 SPF runs about $2.50 to $4 per board foot. Labor time for a typical 12-foot porch run: a day and a half if you’re experienced, two to three days if not.
This works well when the original beam isn’t rotted, just undersized or deflected from increased load. It’s also the cheapest permanent fix — roughly $800 to $1,400 in materials for an average porch, plus your labor.
Full Beam Replacement — When Sister Beaming Isn’t Enough
Sometimes the original beam is too damaged. You need to remove it and install new lumber. This requires temporary support structures (temporary posts and headers holding up the roof while you work), more careful sequencing, and generally a permit.
A pressure-treated 2×10 or 2×12 (depending on span and load) replaces the old beam. Cost: $1,500 to $3,500 in materials. Time: 3 to 5 days if you’re comfortable with the work, including temporary support setup and removal. This is where many homeowners decide to hire a contractor instead.
Full Structural Modification — The Engineer-Recommended Approach
The most robust fix replaces not just the beam but the entire support structure underneath. Old wooden posts get replaced with adjustable posts. Marginal footings get reinforced or replaced. Concrete piers ensure the posts won’t settle further. This is expensive — $4,000 to $8,000 — but it solves the problem comprehensively and typically lasts the life of the house.
This usually exceeds DIY scope because it involves concrete work, precise load calculations, and local code compliance. But it’s the option your insurance and a future home inspector will feel best about.
Common Causes of Porch Beam Sag
Water damage causes the majority of sagging porch beams I’ve encountered. Water wicks up from the ground into wood posts and beam ends. Rot develops. Structural capacity drops silently over years. You don’t notice until deflection becomes visible.
Undersized beams come next. Someone built a porch 30 years ago with a 2×6 when a 2×8 was actually needed for the load. It worked fine for decades. But as the house settled or roof loads increased (heavier shingles, added insulation), the margin disappeared.
Missing or deteriorated support posts happen when original posts were set directly on soil or concrete without proper drainage beneath. Over time, frost heave pushes them up slightly, or settling pulls them down. Gaps develop between post and beam. The beam effectively becomes shorter.
Roof load increase is real — and nobody talks about it. Modern architectural shingles weigh twice what old asphalt shingles weighed. Add a layer of insulation and ice dams, and suddenly the porch beam is carrying 30% more load than it was designed for.
Poor drainage is the preventive angle nobody wants to hear. Water pooling at the base of porch posts. Gutters dumping directly next to the foundation. Improper slope. These create the wet conditions that trigger rot. Fix drainage first, then assess beam damage.
When to Call a Structural Engineer vs Doing It Yourself
Draw the line at these criteria. If any apply, get a professional opinion before touching anything:
- Sagging exceeds 1 inch total deflection
- Multiple cracks radiating from a point (bearing failure)
- Soft spots in wood (rot penetration)
- The sag extends into main house beams, not just the porch
- Posts show signs of heaving or settling
A structural engineer’s report costs $400 to $800 for a typical porch assessment. You get a stamped drawing specifying exactly what repair is needed, load calculations proving your fix will work, and documentation that protects you legally if something goes wrong. That report also satisfies insurance companies if you ever need to file a claim related to structural damage.
For straightforward cases — modest sag, no rot, clear cause (like an undersized original beam) — DIY sister beaming or temporary stabilization works. For anything involving rot removal, code compliance questions, or major structural modification, hire it out. The difference between a $2,000 DIY repair and a $5,000 professional fix narrows quickly once you factor in permit costs, rental equipment, and your time.
The decision isn’t really about money. It’s about whether you can honestly evaluate the damage and execute the repair without creating a liability. Most homeowners can handle measuring, jacking carefully, and bolting lumber. Most shouldn’t attempt removing load-bearing beams or installing new foundations. Know your limits. Beam failure takes the porch with it — and potentially more.

Stay in the loop
Get the latest craftsman charm updates delivered to your inbox.