Why Craftsman Porch Ceilings Crack
Craftsman porch ceiling repairs have gotten complicated with all the drywall advice flying around. As someone who has patched more tongue-and-groove bungalow ceilings than I’d like to admit, I learned everything there is to know about why these things fail — and why most of the fixes you’ll read about online are completely wrong for the job. Today, I will share it all with you.
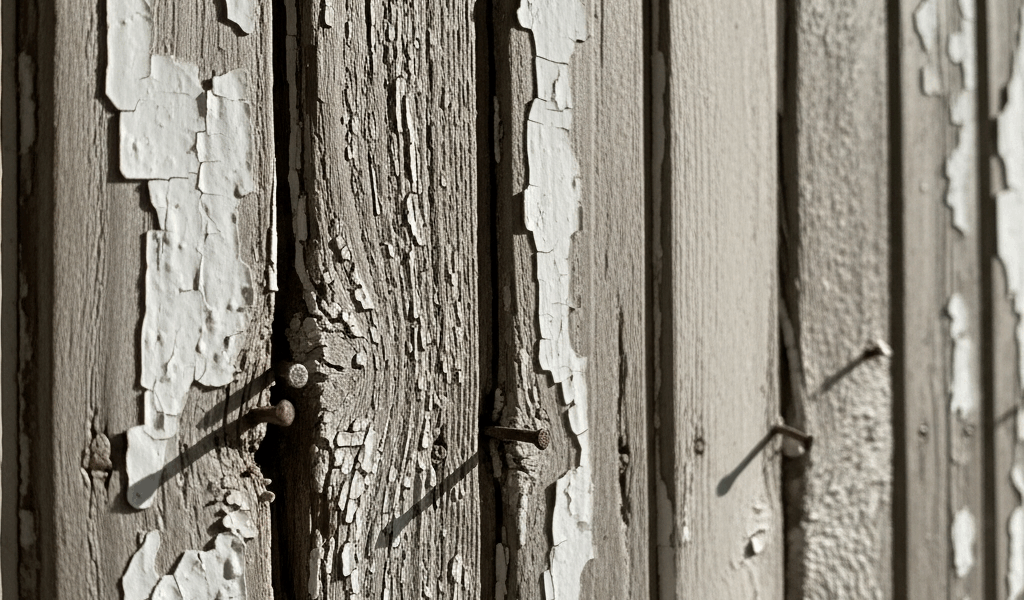
So you’ve got a 1920s bungalow. Maybe a Craftsman-style home with original beadboard overhead. You searched for a fix and landed here. Good. Because what you’ll find on most home improvement sites talks about patching with joint compound. Useless. Your ceiling isn’t drywall. It’s solid wood — usually 4- to 6-inch boards laid perpendicular to the framing — and the failure mode is completely different.
But what is wood movement cracking? In essence, it’s the natural expansion and contraction of solid boards responding to seasonal humidity shifts. But it’s much more than that. Season to season, moisture content in the grain rises in spring and summer, then drops in fall and winter. If the paint layer sitting on top of those boards is too rigid — especially old paint that’s been layered on for eighty years — it can’t flex. Cracks form along the beaded seams or straight down the center of boards. Usually cosmetic. Usually running parallel to the grain.
There are three real culprits. First is that seasonal wood movement I just described. Second is paint bridging — old painters coating over seams without leaving the boards room to shift. Paintable caulk cured rock-hard does the same thing. When the wood moves, the paint cracks instead. You see this constantly on homes where multiple coats have built up over decades without any real maintenance in between. Third is nail pops. Framing above the porch settles slightly over decades — ring-shank or spiral nails work loose and push through the boards. That’s the small dome you sometimes see, with a crack radiating out from it like a tiny starburst.
The diagnostic is straightforward. Cracks running along board seams or down the center of a single board — almost always wood movement. Cracks that spider outward, staining, or soft wood around the damage — those are different animals entirely. Don’t treat them the same way.
When to Call a Pro Instead of DIYing
Probably should have opened with this section, honestly. Not every crack is a weekend project. Some are a phone call.
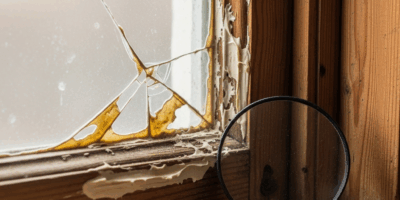
- Soft or spongy wood around the crack. Water has gotten into the grain. Structural integrity is compromised. This isn’t cosmetics — it’s a water damage issue. You need an inspector or restoration contractor, not a caulk gun.
- Staining, mold, or discoloration around the damaged area. Stop. Moisture is sitting in the wood or actively moving through the ceiling system. Call someone who can trace where it’s coming from — usually a roof leak or a gutter that’s been overflowing onto the soffit for a couple of seasons.
- Multiple cracks radiating from one point, or visible sag. Sagging means the framing above is failing or the boards are taking on water weight. That’s structural. Not a paint-and-caulk job.
- Cracks that appeared suddenly or grew fast in recent months. Normal seasonal movement is gradual and cyclical. Rapid cracking suggests an active problem — settling, moisture intrusion, or both at once.
If any of these apply, hire a contractor. Fixing a leaking roof or reinforcing rotted framing costs far less than what happens when you ignore it for another year.
What You Need Before You Start
Don’t make my mistake. First porch ceiling I ever repaired, I grabbed a tub of DAP FastN’Final joint compound — the same stuff I’d used on interior drywall — and smoothed it into every crack I could find. Four months later, every single repair had cracked again. I’m apparently someone who has to learn things twice, and DAP FastN’Final works fine indoors while it never holds up on an exterior wood ceiling. Now I know why: exterior wood moves more than interior walls. Standard joint compound is too brittle for that kind of flex.
What you actually need is paintable exterior caulk — and this choice matters more than you’d think. Head to your hardware store and pick up a tube of DAP Elastopatch or, if you’re in a cold and humid region, Sikaflex-1a or Mapei paintable exterior sealant. The tube has to say “paintable” and “flexible when cured.” Price runs $6 to $12 per tube. Plan on one tube per 20 to 30 linear feet of cracking.
Also grab:
- 80-grit and 120-grit sandpaper — a 5-pack of each runs about $4 to $6
- A 1-inch putty knife for smoothing caulk
- A nail set and a small hammer for nail pops
- Ring-shank nails, 1.5 inches long, for re-securing loose boards — a box of 100 costs $3 to $5
- Exterior primer rated for wood — Benjamin Moore Moorcast or Sherwin-Williams A-100 Exterior Primer, roughly $25 to $35 per quart
- Paint to match your ceiling. Original Craftsman ceilings are almost always a warm cream or off-white, flat or matte sheen. Bring a chip to the paint counter and ask them to match both the color and the sheen — that last part matters more than most people realize.
Interior caulk will fail again the first time the wood expands. So will drywall compound. Buy the right products once and skip the redo.
Step-by-Step Fix for Porch Ceiling Cracks
1. Handle nail pops first. See a small dome with a crack radiating from it? That’s a backed-out nail. Use a nail set and a light hammer to drive it back in, countersinking it about 1/8 inch below the surface. If it won’t hold, pull it with a cat’s paw and drive a new 1.5-inch ring-shank nail 2 inches from the old hole. Ring-shank nails grip the wood grain differently — far less likely to back out again over time.
2. Prep the crack. Sand away loose or flaking paint in a 2-inch band on either side of the crack using 80-grit sandpaper. You don’t need to strip everything — just get down to a solid surface. Vacuum the dust. Figure about 10 minutes per 8 linear feet of cracking.
3. Apply the caulk. Cut the tube nozzle at a 45-degree angle, opening it to about 1/4 inch wide. Run a steady bead along the crack, then use your putty knife to smooth it flush — drag from one end to the other in one pass if you can. Work in 3-foot sections if this is your first time. The caulk sets up faster than you expect. Wipe the putty knife with a damp cloth between passes. Take your time here. This is the most visible part of the whole repair.
4. Let it cure fully. DAP products typically cure in 24 hours. Some flex sealants need 48. Cold weather slows that down considerably. Patience here prevents you from sanding too early and breaking the bond you just created.
5. Sand lightly when cured. 120-grit sandpaper, gentle pressure. You’re feathering the edges so the repair blends into the surrounding finish — not removing the caulk. Vacuum again when done.
6. Prime the repair. This step gets skipped constantly. Don’t skip it. Roll or brush exterior primer over the caulked area and about 6 inches out on all sides. One coat is usually enough. Let it dry per the manufacturer specs — typically 2 to 4 hours. The primer seals the caulk and the exposed wood grain and keeps the final paint coat from looking thin or patchy.
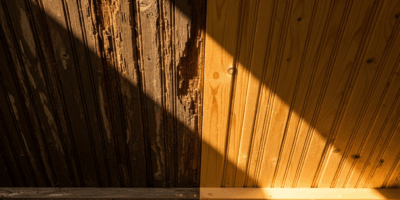
7. Paint to match. Apply your finish coat in natural light so you can actually see the color. Flat or matte ceiling? Match that sheen exactly — don’t use satin or semi-gloss unless your ceiling already has it. Two coats beat one on any repair, every time.
Keeping Your Porch Ceiling From Cracking Again
That’s what makes a well-maintained Craftsman porch endearing to us old-house people — it rewards consistent, simple attention. These porches were built to outlast everyone who lives under them. They still can.
Walk your porch roof and gutters every spring and fall. Clear leaves and debris so water runs freely. Water sitting in gutters — or backing up onto the soffit — finds its way into the porch framing and the ceiling boards below faster than most people expect. I’ve seen porches completely destroyed by a clogged downspout. That was a $14,000 repair on a house that could have spent $0 on a 20-minute cleaning twice a year.
Repaint your ceiling every 5 to 7 years if it’s exposed to weather. On a covered porch with a deep overhang, maybe 10 years is reasonable. The goal is to maintain a continuous paint film before it starts breaking down at the edges and seams. A fresh coat costs under $200 and takes a weekend. Ignoring it costs thousands when water works into the wood grain and starts the rot cycle.
Every couple of years, re-caulk visible seams that are starting to open up. Faster than waiting for full cracks to develop — and you skip the sanding, priming, and repainting that come with a real repair job.
Fix it right and this ceiling will outlast you. That’s not a bad thing to leave behind.


Stay in the loop
Get the latest craftsman charm updates delivered to your inbox.