Why Craftsman Porch Fans Wobble More Than Indoor Fans
Craftsman porch ceiling fan wobbling has gotten complicated with all the generic “just tighten the screws” advice flying around. As someone who spent two genuinely miserable weeks last summer chasing a shake in my screened porch fan, I learned everything there is to know about why these particular fans misbehave. Today, I will share it all with you.
The short answer: your porch is not your living room. Not even close.
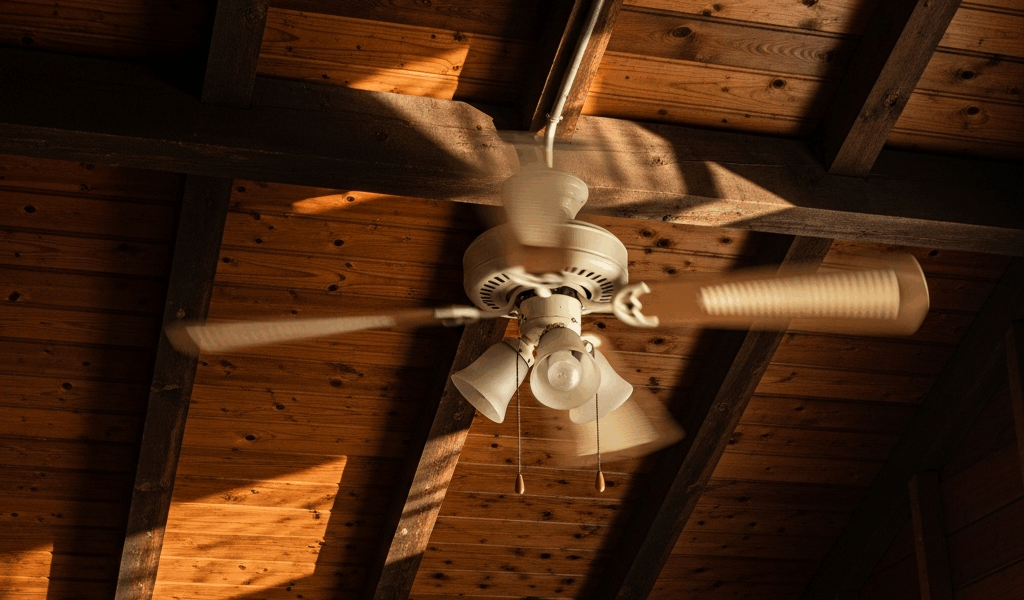
Craftsman porch ceilings are built with tongue-and-groove boards — real wood that breathes, swells in July, and shrinks back down by October. Flat drywall inside your house just sits there. Out on the porch, that seasonal movement loosens hardware that would stay perfectly tight in a climate-controlled bedroom for a decade. One summer, gone.
Those exposed beams carry vibration differently too. The fan isn’t floating in isolation — it’s anchored to structural lumber that amplifies every tiny imbalance. A wobble you’d barely notice on a bedroom ceiling becomes a full-on rattle above a porch. I’ve seen it knock a globe loose from a light kit in about three weeks flat.
Older Craftsman homes throw another wrinkle in. Sixteen or 24 inches on center is standard framing indoors, but historic porch framing? I’ve measured spacing all over the map — 19 inches, 22 inches, nothing predictable. The mounting box might land perfectly on a joist or it might straddle two unevenly. An electrical box rated for a light fixture handles maybe 2 or 3 pounds. A 42-inch fan pulls 15 to 20 pounds at speed, plus lateral force every time a breeze catches the blades.
Humidity is the fourth villain. Porch ceilings stay damp longer than interior spaces — wood softens, fasteners back themselves out, boxes shift in their rough openings. That’s what makes this problem so endearing to us Craftsman homeowners. Every single failure mode works against us at once.
Generic wobble-fixing advice assumes drywall, standard framing, stable indoor air. None of that applies here. So, without further ado, let’s dive in.
Check the Mounting Box Before Anything Else
Probably should have opened with this section, honestly. I spent two weeks tightening blades and shuffling balance weights around before I realized the box itself was the actual problem. Don’t make my mistake.
Kill the power at the breaker first — not just the wall switch. Then climb up and press your palm firmly against the canopy, the metal cap where the downrod disappears into the ceiling. Push straight up, then sideways. The box should not move. Not a millimeter. Not a whisper of flex.
If it shifts under hand pressure, your box is either undersized or it’s worked itself loose in the opening.
Look for stamped text on the box itself — something like “rated for ceiling fans” or “fan support.” Older boxes, especially in Craftsman homes built before 1960, were designed to hold a light fixture. That’s it. A 60-watt pendant weighs almost nothing. A 42-inch porch fan does not.
If your box isn’t fan-rated, replace it. This is not optional. I’m apparently stubborn about skipping steps and retrofitting always costs me twice — the right box costs about $18 at any hardware store and works for me while improvised solutions never do.
To replace it, you’ll need to cut away some tongue-and-groove boards around the opening. Sounds dramatic. It’s actually cleaner than trying to force a rated box into the existing hole. An oscillating tool with a wood-cutting blade — I used a Fein MultiMaster, though a $35 Ryobi works fine — gives you a controlled cut. Go about 3 inches wider than the new box diameter.
Brands like Caddy and Thomas & Betts make retrofit fan boxes built specifically for older construction. Mount directly to the joist using ½-inch lag bolts — not into surrounding wood, not into the tongue-and-groove. The joist. Once that box is mechanically, physically immovable, you’ve probably solved 70 percent of your problem right there.
Tighten Every Connection From the Ceiling Down
Hardware backs out on porch fans faster than you’d expect. Every gust that hits the blades, every footstep across the porch floor — each one sends a tiny vibration through the whole assembly. Ten thousand tiny vibrations per season loosens every fastener you own.
The sequence matters. Start at the top and work down.
- Canopy screws — Four screws, usually ¼-inch hex head, holding the metal cap to the mounting box. Tighten each until you feel solid resistance — not until you hear cracking or feel the head start to strip.
- Downrod set screw — The one fastener almost everyone misses. It’s a small hex or Phillips head on the side of the downrod where it meets the motor. Easy to overlook. Tighten it anyway.
- Blade bracket screws — Four to six screws per bracket, connecting each bracket to the motor housing. A 1/16-inch Allen key or a standard Phillips driver. Snug, not gorilla-tight — these are usually going into aluminum housings that strip easily.
- Blade mounting screws — Two per blade. Twelve total on a four-blade fan. Check every single one, because they loosen at different rates and one loose blade will drive you insane.
Here’s what I wish someone had told me before I reassembled my fan the first time: apply a drop of medium-strength thread-locking compound to the fasteners most prone to backing out. Loctite 243 — the blue bottle, not the red permanent stuff — costs about $9 at Home Depot. The canopy screws, the downrod set screw, and the blade bracket screws all get a tiny drop each. Let it cure 24 hours before turning the fan back on. On a porch fan, this isn’t overkill. It’s just standard practice.
Balance the Blades the Right Way
But what is blade imbalance, exactly? In essence, it’s one blade carrying slightly more weight than the others — throwing off the rotation just enough to create a wobble. But it’s much more than that, especially on Craftsman porches where humidity warps wood unevenly over time.
With the fan running at medium speed, step back and watch the rotation pattern. The wobble will peak consistently when one particular blade passes the same point in its arc. That’s your heavy blade. Mark it with a strip of painter’s tape on the leading edge. Turn the fan off.
Pick up a ceiling fan balancing kit — they run between $10 and $25, and Westinghouse and Harbor Breeze both sell them at most hardware stores. The kit includes adhesive weights in a few different sizes, usually starting at 0.5 ounces.
Place the lightest weight about 6 inches from the tip of your marked blade, upper surface only. Turn the fan back on at medium speed. Better? You’re moving in the right direction. Worse? Try the next blade over. Keep testing and repositioning until the wobble nearly disappears.
First, you should check whether your blades are warped before you chase balance weights indefinitely — at least if you want to avoid wasting an afternoon. Lay each blade on a flat surface and look for a twist or a dip near one end. Craftsman porch humidity warps blades unevenly over time, and no amount of counterweighting fixes a blade that’s genuinely deformed. Replacement is the smarter call. A set of replacement blades for a standard 42-inch fan runs about $30 to $45 online — cheaper than losing a Saturday to a problem that won’t solve itself.
When the Wobble Comes Back Every Season
If your wobble reappears every spring, seasonal wood movement in the porch ceiling is the root cause. That’s the nature of a Craftsman porch — the structure is alive in a way that interior spaces aren’t. You can fight it or you can plan for it.
Plan for it. Re-tighten all fan hardware once every 12 months, right at the start of heavy-use season. Put it on your calendar — honestly, a recurring May reminder. Five minutes with a socket set and a Phillips driver prevents months of rattling.
A wet-rated fan might be the best long-term option, as porch installation requires sealed motors and stainless hardware designed for humidity and temperature swings. That is because standard fan components — aluminum brackets, plated steel screws — corrode and loosen faster in outdoor exposure than wet-rated components do. Emerson and Minka Aire both make solid porch-specific models. The Emerson CF765 runs around $180 and holds up noticeably better than a standard indoor fan pressed into outdoor service.
One last thing — if the wobble feels structural rather than mechanical, get your porch ceiling inspected before doing anything else. Sagging joists, rot in the header, foundation settling — none of that gets fixed with a balancing kit. A contractor can spot it in 20 minutes. Usually costs nothing for the initial look.
Most of the time, though? Solid mounting box, tight fasteners, balanced blades. That was my problem, and fixing all three in the right order finally gave me a quiet porch fan. Took longer than it should have. Hopefully yours takes less time than mine did.


Stay in the loop
Get the latest craftsman charm updates delivered to your inbox.