Craftsman Porch Tongue and Groove Ceiling Rotting Fix
Fixing a rotting craftsman porch tongue and groove ceiling has gotten complicated with all the conflicting advice flying around. As someone who spent three weekends on her knees atop a six-foot ladder poking at a 1927 bungalow ceiling with a flathead screwdriver, I learned everything there is to know about this exact problem. Today, I will share it all with you.
Most guides do one of two things: shrug and say “hire someone” or immediately assume you’re gutting the whole ceiling. Neither helps. What actually works is something in between — a targeted fix that removes only what’s compromised and replaces it so cleanly nobody knows anything happened. That’s the approach we’re taking here.
So, without further ado, let’s dive in.
How to Tell If the Rot Is Isolated or Spreading
Don’t cut anything yet. Seriously. I cannot stress this enough.
Grab a flathead screwdriver and start probing the boards in the damaged zone. Press the tip firmly into the wood grain, perpendicular to the face. Healthy wood pushes back. Rotted wood just… gives. It’s an unsettling feeling once you know what you’re looking for.
But what is the real danger here? In essence, it’s invisible spread. But it’s much more than that — water doesn’t rot a board evenly from the face down. It travels along the groove first, meaning the damage underneath is always larger than what’s visible from below. Always. I found one board that looked almost fine except for a two-inch soft spot near a joist. Pulled it back and the entire rear face was gone for 18 inches in both directions.
- Probe every board within two feet of visible damage — all directions, not just lengthwise.
- Check the tongue-and-groove seams with an awl. Press into the seam itself, not just the face.
- Mark every soft area with a pencil. Your actual cut lines need to sit at least 6 inches past the furthest soft spot you find.
- If rot hits more than three consecutive boards or has reached the joists themselves, stop and call a contractor. Structural rot is a different conversation entirely.
I went in planning to replace one board. I replaced two. The second was completely hidden behind the first when viewed from below — I never would have caught it without probing. Don’t make my mistake.
Cutting Out Damaged Boards Without Wrecking the Neighbors
Precision matters here. Torn, ragged edges make the final fit worse and the repair line more visible.
Mark your cut lines with a pencil and a speed square. Draw perpendicular marks across the board face where cuts will happen — ideally through the center of the groove on either side of your soft spots. You’re cutting on the seam, not across the middle of a good board.
An oscillating multi-tool with a metal-cutting blade is ideal for this. Full speed, vertical cuts along the groove line. The goal is severing the tongue-and-groove connection cleanly without wandering into adjacent boards. Steady hand pressure. No rushing.
Once the groove cuts are done, drill two relief holes at the end of each board you’re removing — one near each joist, 3/8-inch bit, close to the cut line. These prevent lengthwise splits when you start prying. I skipped this step on the first board. Regretted it immediately.
Now pry slowly. I used a flat pry bar and alternated sides so the board came up evenly rather than torquing against one joist. The real risk is snapping the tongue off an adjacent good board — if you feel hard resistance, stop and recheck your groove cuts before applying more force. Work parallel to the grain direction whenever possible. It’s gentler on everything around the damaged section.
Pull the nails from the joists once the board is free. A cat’s paw works well here. Put a scrap block under the fulcrum so you’re not digging into the joist face.
Matching the Bead Board Profile on a Craftsman Porch
Probably should have opened with this section, honestly.
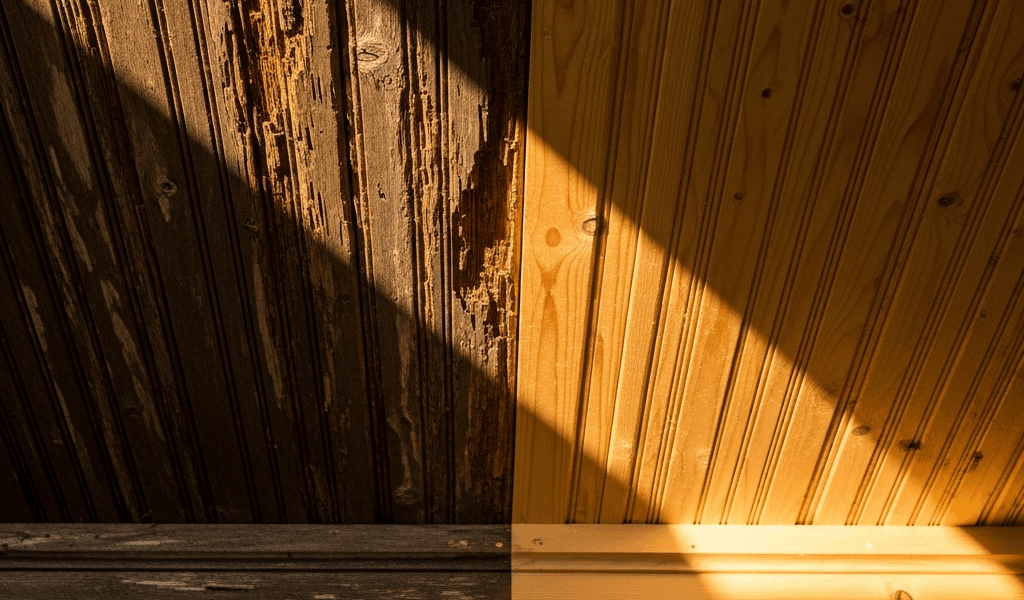
Standard craftsman bead board is 3.5 inches face width with a single center bead running the full length. That profile does not exist at Home Depot. The big box stores carry 4-inch tongue-and-groove with V-grooves or multiple beads — profiles that look completely wrong next to early-1900s original work. I wasted a Saturday trip before I figured this out.
I made three phone calls. A local hardwood lumber yard that mills its own pattern stock had clear 1×4 pine in the exact profile for $2.80 per linear foot. They had physical samples I could hold up to the ceiling. That’s what you want.
Your sourcing options, in order of reliability:
- Local hardwood lumber yards — call ahead and ask specifically for “1×4 T&G with center bead.” Bring a photo or a pulled sample board if you can.
- Architectural salvage yards — original stock pulled from period homes, often in shorter pieces. Good for small repairs.
- A local mill or cabinet shop with a router table — they can profile-match from a sample you bring in. Expect $4–$6 per linear foot, but it’s an exact match.
Measure the length you need and add 1.5 inches for cutting and fitting. Order boards primed on all four sides — every face, every edge. If they arrive unprimed, do it yourself before you install a single piece. Unprimed wood in a humid porch environment is exactly how rot starts. You’re not doing this repair twice.
Fastening and Filling the Replacement Boards
Blind nailing is the only way to do this that looks right. The nail goes into the tongue at 45 degrees, where the adjacent board’s groove will hide it completely.
Drive nails roughly 2 inches from each board end and again near each joist. I use 2-inch stainless ring-shank nails — ring shank grips better in softwood, and stainless won’t rust through the paint finish five years from now. I’m apparently a pneumatic brad nailer person and a Bostitch BTFP12233 works for me, while hammering overhead never goes as smoothly as it sounds in tutorials.
New wood is tighter grained than 95-year-old wood. Slight gaps along the bead line may appear after one season of movement. That’s normal — it’s not a failure, it’s wood being wood. Fill those gaps with paintable exterior caulk. I used DAP Fast ‘N Final in white and applied it only along the bead line itself, not across the board face. A thin line at the groove reads as intentional detail. Caulk smeared across the face reads as a patch job. The difference matters more than you’d expect.
Painting the Repair So It Disappears Into the Old Ceiling
The patch always shows if the paint is wrong. Always.
Don’t paint only the new boards. Paint the entire ceiling run — wall to wall, full length. A lap line where new paint meets old is visible forever, especially on a covered porch where light hits at low angles in the morning and evening. I made exactly this mistake on my first board and repainted the whole section anyway. Learned it the hard way so you don’t have to.
Prime all new wood with a quality exterior primer — I use Sherwin-Williams A-100 on porch work. Two coats minimum. Follow with two coats of porch-and-floor enamel or exterior satin in your chosen color.
Classic craftsman porch ceiling colors run toward soft white, pale sage, and muted blue-grey. My ceiling was a sage I matched at Sherwin-Williams — $38 per gallon, Color 6179 Soft Fern if it helps anyone. I feathered each coat outward from the repair zone, overlapping slightly onto existing paint to avoid hard edges. Stop at a natural visual break — a wall, a beam, a transition point. Never stop mid-ceiling.
When the final coat dries, the work disappears. No visible seams. No obvious patch. Just a consistent ceiling that looks like it was painted last spring and will last another century — at least if it stays dry, which is the whole point of doing this right the first time.


Stay in the loop
Get the latest craftsman charm updates delivered to your inbox.