Building a woodworking workshop from scratch is one of those projects where planning actually matters more than spending. I’ve set up three shops over the years — a cramped garage corner, a two-car garage conversion, and eventually a dedicated outbuilding — and the biggest lessons came from what I got wrong early on. The tools are the exciting part, but the infrastructure underneath them determines whether your shop actually works or just looks good in photos.
Assessing Your Space
Start by being honest about what you’ve got. Grab a tape measure and document everything: floor dimensions, ceiling height, door widths, window locations, and where the electrical panel lives. Note every permanent obstacle — support posts, water heaters, HVAC equipment. These constraints shape your shop more than any design magazine layout will.
A single-car garage gives you roughly two hundred square feet, and it feels small fast. You can fit a table saw and maybe a bandsaw with mobile bases, but material handling gets awkward the moment you’re working with anything over six feet. Wall-mounted storage helps, but there’s no getting around the physics of limited floor space. If this is what you’ve got, make it work — but know the limitations going in.
Two-car garages are the sweet spot for most hobby woodworkers. Four hundred square feet accommodates a real machine collection with room to actually assemble things. Plenty of people build impressive furniture in this footprint. If you’re sharing with vehicles, invest in quality mobile bases for everything — rolling machines against the wall to park cars is annoying but manageable.
Dedicated shop buildings are the dream scenario. You control the ceiling height, electrical service, insulation, and layout from the ground up. If you’re building new, make it bigger than you think you need. Every shop I’ve seen — including my own — felt spacious for about six months before tools and lumber started eating the open space. Size generously or you’ll regret it.
Basement shops are convenient but come with built-in headaches. Low ceilings limit dust collection ducting and tall machines. Getting sheet goods down stairs is a workout. Humidity needs constant management. And unless you’re disciplined about dust containment, fine particles migrate into the living space above. It can work, but go in with eyes open about the compromises.
Infrastructure Requirements
Electrical service is the infrastructure item that bites people hardest. Your standard household circuit can’t run a cabinet saw and a dust collector at the same time. If you’re serious about this, talk to an electrician before you buy machines — not after.
Table saws and planers typically need their own dedicated 15- or 20-amp circuits. Running two machines simultaneously requires separate circuits for each. Bigger cabinet saws and industrial planers may need 220-volt service, which is a different conversation entirely. Have your electrician evaluate the main panel’s capacity for the loads you’re planning — adding a subpanel in the shop is common and worth the cost.
Put outlets where machines will actually live, not where they’re convenient to wire. Extension cords across the shop floor are trip hazards and voltage-drop problems. Install outlets at bench height for portable tools. If machines live in the center of the room, ceiling drops with retractable cords are a clean solution.
Lighting matters more than most people think. Natural light from windows or skylights reduces eye strain and just makes the space more pleasant to work in. North-facing windows give you consistent, shadow-free light throughout the day. Position task lighting at the table saw, bandsaw, and workbench — these are the stations where you’re reading layout lines and need to see detail.
How much light is enough? If you can’t comfortably read a pencil line on wood from arm’s length, you need more. High-output LED shop lights are cheap and effective. I run six 4-foot LED fixtures in a 400-square-foot shop and it’s just right. Supplement general overhead lighting with adjustable task lights at critical stations.
Climate control keeps you in the shop and keeps your wood stable. Working in a 95-degree shop in July or a 40-degree shop in January gets old fast — and extreme humidity swings cause wood movement problems that show up in your projects as gaps, warps, and cracked glue joints. A mini split system handles both heating and cooling efficiently. At minimum, insulate the space and add a heater for winter.
Speaking of insulation — even basic wall and ceiling insulation makes a dramatic difference in temperature stability, energy costs, and noise transmission. Your neighbors will appreciate it too. For attached garages, insulation also creates a barrier that keeps workshop dust and finish fumes out of the house.
Dust Collection Systems
Dust collection isn’t optional. It’s a health issue, a fire safety issue, and a shop cleanliness issue all wrapped into one. The two components you need are source collection (catching dust at the machine) and ambient filtration (cleaning the air you breathe). Neither alone is sufficient.
Single-stage collectors pull everything — chips, dust, shavings — directly through the impeller and into a collection bag. They’re affordable and work fine for a basic shop with one or two machines. The downsides: the impeller takes a beating from large chips, and the filter bags clog over time, quietly reducing performance until you notice your tools are spitting dust everywhere.
Two-stage collectors use a cyclone or pre-separator to drop large debris out before it hits the impeller. The impeller only handles fine dust, which extends its life and lets you use finer filter media without clogging as fast. If you can afford the step up, two-stage is noticeably better. Most serious hobby shops land here.
Size your collector to match how you actually work. A 1-HP single-stage handles one machine at a time — fine if you’re the only person in the shop and disciplined about blast gates. Larger 2-HP or 3-HP collectors power central ducted systems with multiple drops. Match the system to your machine complement and your workflow, not to what the manufacturer’s marketing says it can handle.
Duct design makes or breaks a collection system. Short, straight runs of smooth metal duct move air efficiently. Every elbow, flex hose section, and extra foot of length reduces airflow. Undersized main trunks choke even powerful collectors. If you’re installing permanent ducting, read up on duct design principles first — the science isn’t complicated, but getting it wrong means rebuilding later.
Ambient air filtration handles what source collection misses. Fine particles under 10 microns stay airborne for hours after you turn off machines, slowly settling on every surface and into your lungs. A ceiling-mounted air filtration unit running continuously keeps the air clean between operations. These aren’t expensive and they make a real difference in air quality.
Personal respiratory protection is your last line of defense. Even with good collection and filtration, operations like sanding generate dust concentrations that warrant a respirator. A properly fitted N95 is the minimum; a powered air-purifying respirator (PAPR) is more comfortable for extended wear. Don’t skip this. Woodworking dust causes real, documented health problems over time.
Layout and Workflow
Good layout isn’t about making the shop look organized — it’s about minimizing the distance you carry heavy things and maximizing the space around machines for safe operation. Think about how a board moves from the lumber rack to a finished component. That path should flow naturally without backtracking or awkward transitions.
Lumber storage goes near the first processing step, which is usually the jointer or table saw. Long boards need a clear path from the rack to the machine — eight-foot boards don’t navigate tight corners well. Create a staging area where rough stock waits after selection and before milling.
The milling sequence in most shops runs: jointer (flatten one face and one edge), planer (thickness to final dimension), table saw (rip to width and crosscut to length). Position these three machines to support that flow without making you carry boards back and forth across the shop. Leave generous infeed and outfeed clearance at each machine — a table saw needs at least eight feet of clearance on both sides.
Assembly needs flat, stable surfaces at a comfortable height. Dedicated assembly tables are worth the floor space they consume. Using machine surfaces for assembly means clearing and reconfiguring every time you switch between milling and glue-up, which gets tedious fast. Even a simple torsion-box table on a sturdy base works well.
Finishing deserves its own area if you have the space. Good lighting is critical for seeing surface prep quality. Ventilation removes fumes and prevents dust contamination. Dust settling in wet finish ruins the work, so physical separation from dusty operations matters. At minimum, do your finishing after thorough cleanup and let the dust settle before opening a can of finish.
Keep paths clear. Carrying a heavy tabletop through an obstacle course of tool carts and lumber piles is frustrating and dangerous. Maintain clear walkways between work zones, and never block your exit routes with equipment or materials.
Workbenches and Work Surfaces
Your workbench is the center of handwork — planing, chiseling, layout, carving, sanding. Position it where the light is best, leave room on all sides for clamping, and make sure you can comfortably reach every area of the top without stretching awkwardly.
Bench height is personal. The old rule of thumb — wrist height when standing with arms relaxed — works as a starting point. If you do a lot of hand planing, go a bit lower so you can use body weight for power. If you do mostly detail work, go higher to reduce bending. When in doubt, build slightly tall — you can always put a mat under your feet or trim the legs, but adding height is harder.
Assembly tables supplement the workbench for larger glue-ups. They don’t need to be fancy — a torsion box on sturdy legs provides a dead-flat surface that’s economical to build. Match the height to the work: slightly lower than bench height works well for assembly where you need downward clamping pressure.
An outfeed table behind the table saw serves double duty — catching material exiting the saw and providing additional flat work surface when the saw isn’t running. Build it exactly level with the saw table surface. Even a 1/16-inch difference catches boards as they pass through. Integrate storage underneath for clamps, push sticks, and jigs.
Mobile work carts on quality locking casters let you reconfigure the shop for different projects. They roll out of the way when you need floor space and position wherever you need them for a specific operation. The trade-off is stability — even good casters have some play. Use robust locks and keep floors reasonably level.
Storage Solutions
Storage is one of those things that’s never sufficient no matter how much you build. But good storage — where you can find things quickly and put them back easily — makes a meaningful difference in how efficiently you work.
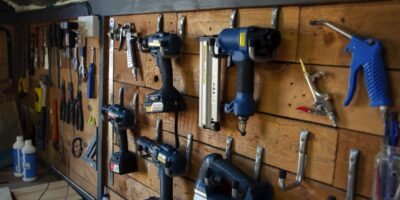
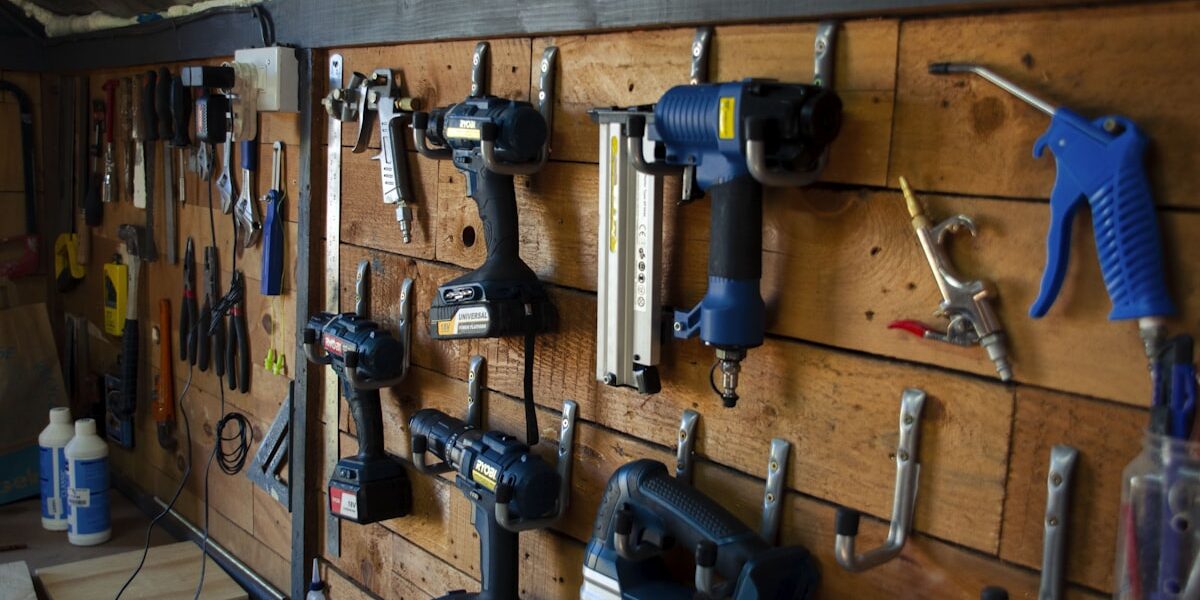
Wall-mounted storage maximizes vertical space without eating floor area. French cleats are my favorite system — they’re strong, flexible, and let you rearrange tool holders without drilling new holes. Pegboard works too, though it’s less rigid. Keep your most-used hand tools at comfortable reaching height. Seasonal or specialty tools can live higher or lower.
Enclosed cabinets protect tools from dust and hide the visual clutter that makes a shop feel chaotic. Drawer systems are excellent for organizing small items — chisels, marking tools, drill bits, sandpaper. Consider glass-front doors on cabinets so you can see contents without opening them every time.
Lumber storage is a space-hungry necessity. Horizontal racks keep boards flat and make selection easy — you can see what you have and pull specific boards without disturbing the rest. Vertical racks use less floor space but make it harder to browse your stock. Most shops end up with some combination of both: horizontal for the boards you’re actively using, vertical for long-term storage.
Sheet goods — plywood, MDF, hardboard — are heavy and awkward. Full 4×8 sheets weigh 60-90 pounds and don’t cooperate when you’re wrestling them alone. Vertical storage against a wall with a simple rack to keep sheets upright saves the most space. Make sure you can slide individual sheets out without moving the entire stack.
Hardware organization prevents the maddening cycle of buying screws you already own because you can’t find the ones in the shop. Small-parts bins, labeled drawers, or fishing tackle organizers keep fasteners, hinges, knobs, and fittings sorted. Label everything. Future you will thank present you.
Safety Infrastructure
Build safety into the shop from the start. Retrofitting safety features later costs more and usually means they’re compromised versions of what you’d have installed initially.
Fire safety is straightforward but non-negotiable. Mount a fire extinguisher rated for wood and electrical fires near the exit — not buried behind the table saw where you can’t reach it during an emergency. Store finishing rags in a sealed metal container; spontaneous combustion from oil-soaked rags in a trash can is a real thing that actually happens. Keep exits clear at all times.
First aid supplies should be within arm’s reach of where you work. Stock bandages, antiseptic, butterfly closures, and a tourniquet. Post your shop address and emergency numbers prominently — in a serious emergency, adrenaline makes it surprisingly hard to remember your own address. If you work alone, tell someone when you’re heading to the shop and when you expect to be back.
Machine guards exist for a reason. Keep them installed and use them. If a guard genuinely interferes with a specific operation, build a jig that provides equivalent protection rather than simply removing the guard. The table saw blade guard argument has been going on for decades — modern riving knives and splitters provide real protection without the frustration of old-style guard assemblies.
Electrical safety means proper grounding, GFCI protection on circuits where appropriate, and no overloaded outlets. Have a licensed electrician do the wiring. Inspect power cords regularly for damage — a nicked cord on a tool that generates vibration is a shock hazard. Keep cords out of walking paths.
Growing With Your Practice
Your shop will change as you change. The workbench setup that made sense when you were building cutting boards won’t serve you when you’re building furniture. Plan for evolution even as you build for today.
Size electrical service and dust collection for where you’re heading, not just where you are. Adding a 220-volt circuit later is more expensive than including it in the initial installation. Running a dust collection main trunk with capped branches for future machines costs almost nothing extra during installation.
Document everything you install. Map the wiring runs, note the duct locations, photograph anything you cover up with drywall. When something needs repair or modification in five years, you’ll be glad you did. Keep a shop notebook with what works, what doesn’t, and what you’d change.
Revisit your layout annually. As your projects get more complex and your skills develop, your workflow changes. A layout that worked perfectly for small boxes might fight you when you’re building a dining table. Don’t hesitate to rearrange when the current setup creates friction.
The Bottom Line
A shop that’s planned well becomes a place you want to spend time — not just a room full of machines. Get the infrastructure right first: electrical, dust collection, lighting, and climate control. These are the hardest things to retrofit later and they have the biggest impact on daily work quality.
Start with what you can afford and improve incrementally. Buy the best core machines you can and fill in around them. Invest in good lighting and dust collection before you invest in specialty tools you’ll use twice a year. And leave some open floor space — the temptation to fill every corner with tools is real, but you need room to work more than you need another machine.
The best shop is the one that makes you want to walk through the door and start building. Get the fundamentals right and everything else follows.
Common Workshop Planning Mistakes
I’ve made most of these myself, so take it from someone who’s learned the hard way:
Underestimating space is universal. Machines need way more room than their footprint suggests once you account for infeed, outfeed, and operator position. A table saw might have a 30-inch footprint, but you need eight feet of clearance front and back for ripping full sheets. Multiply that reality across every machine and you’ll see why shops always feel smaller than the floor plan promises.
Skimping on electrical service creates problems you’ll pay to fix later. Running your table saw and dust collector on the same circuit blows breakers at the worst possible moments. Plan for more circuits than you think you need, and seriously consider 220-volt service for your main machines even if your first saw runs on 110.
Poor lighting is an easy fix that people ignore too long. If you’re squinting at layout lines or can’t see tearout on a freshly milled board, your lighting is inadequate. Shop lights are cheap. Install more than you think you need — I’ve never heard anyone complain about too much light in their workshop.
Bolt-on dust collection never works as well as a system designed from the start. Running flex hose to every machine creates a spaghetti mess that reduces airflow and creates trip hazards. Plan your ducting layout when you plan your machine layout. They’re the same design problem.
No climate control means no working in the shop during extreme weather, which in most of the country means losing several months of shop time per year. Even basic heating and insulation dramatically extend your usable season.
Ignoring workflow during layout means you’ll carry lumber across the shop to the jointer, carry it back to the planer, carry it to the table saw on the opposite wall, and wonder why you’re exhausted before you’ve built anything. Think about material flow first, aesthetic arrangement second.
Budget Considerations
Workshop setup costs more than you budget for. It always does. Accept this and plan accordingly.
Machines take the biggest bite — a quality table saw, jointer, planer, and bandsaw represent a serious investment. Prioritize based on what you actually build. Most woodworkers need a good table saw before they need a drum sander. Build your machine collection gradually as your skills demand specific capabilities.
Infrastructure costs catch people off guard. Electrical upgrades, dust collection systems, insulation, lighting, and climate control add up to thousands of dollars before you’ve bought your first machine. Budget for these explicitly. A shop with great machines but inadequate electrical service and no dust collection isn’t actually functional.
Hand tools and accessories are death by a thousand cuts. Quality measuring tools, a good set of clamps (you always need more clamps), sharpening equipment, jigs, fixtures, and safety gear add thousands to the total. Budget for these alongside your machines, not as an afterthought.
Operating costs continue indefinitely. Saw blades dull, sandpaper depletes, finish gets used up, filters need replacing, and the electric bill goes up. Factor in recurring expenses when you’re calculating whether your woodworking hobby fits your budget.
Used equipment is a legitimate strategy for budget relief. Quality machines hold up for decades and depreciate heavily the moment they leave the store. Patient shopping on Craigslist, estate sales, and woodworking forums turns up excellent machines at a fraction of new prices. Allow time for deals to appear rather than buying everything new on day one.
Planning Resources
Read other people’s shop tours before you finalize your own layout. Woodworking magazines and YouTube channels feature shop tours regularly, and the most useful ones include honest assessments of what works and what the owner would change. The retrospective view — “I wish I’d done X differently” — is worth more than any idealized plan.
Visit other shops in person if you can. Online content shows you layouts, but standing in someone else’s shop teaches you about proportions, traffic flow, and noise levels in ways a photo can’t. Most woodworkers are happy to show off their space and share what they’ve learned. Ask what they’d do differently.
Mock up your layout before committing. Put painter’s tape on the floor where machines will sit, including infeed and outfeed clearances. Walk through a pretend workflow carrying an imaginary board. You’ll find the bottlenecks immediately. Adjust the tape until the flow works, then install the machines.
Draw it to scale on paper or in a free tool like SketchUp. A top-down view reveals spatial conflicts that you miss when standing in the space. Try multiple layouts. Moving rectangles on a screen costs nothing; moving a 400-pound table saw costs your back.