Oil-Rubbed Bronze and Hammered Copper: Hardware That Completes the Craftsman Look
Hardware is the jewelry of a Craftsman home — and I don’t mean that in a decorative, frivolous way. I mean it the way a good watch finishes an outfit: get it right and nobody consciously notices, get it wrong and everything feels off. The wrong hinges, pulls, or switch plates can undermine beautiful woodwork faster than a bad paint choice. Original Arts and Crafts homes used specific hardware styles that complemented their honest-construction philosophy, and the good news is that modern reproductions make nailing that look more accessible than ever.
The Craftsman Hardware Philosophy
Gustav Stickley and his contemporaries had strong opinions about hardware, which shouldn’t surprise anyone familiar with the Arts and Crafts movement. They rejected the ornate, mass-produced Victorian hardware that dominated the market and instead favored:
Visible function: Hardware that looks like what it is. Hinges that obviously pivot. Pulls that clearly grip. Nothing hiding its purpose behind decorative flourishes. If it works like a hinge, it should look like a hinge.
Hand-worked appearance: Hammer marks, slight irregularities, matte finishes — visual evidence that a human made this, not a stamping machine. This wasn’t about sloppy craftsmanship; it was about honest craftsmanship.
Natural materials: Copper, bronze, and iron that develop character over time. These metals age gracefully, building patina that adds depth rather than degrading. They also connected indoor hardware to outdoor elements like porch lights and gate hinges, creating material continuity throughout the property.
Integration with woodwork: Hardware sized and finished to work with quarter-sawn oak and Douglas fir trim, not fight against it. The hardware should feel like it belongs with the wood, not like it arrived from a different design universe.
Oil-Rubbed Bronze: The Versatile Standard
Oil-rubbed bronze became the dominant Craftsman hardware finish for reasons that still hold up today:
Warm undertones: That brownish-black finish picks up red and gold tones that complement oak’s natural warmth. This is why it reads more inviting than stark black iron, even though the colors look similar from across the room. Up close, the difference is obvious.
Living finish: True oil-rubbed bronze changes over time as hand oils and environmental exposure affect the surface. High-contact areas like door knobs gradually lighten while protected areas stay dark, creating natural variation that makes the hardware look more authentic with each passing year. A ten-year-old oil-rubbed bronze knob has more character than a new one, which is exactly the Craftsman ideal.
Availability: Major hardware manufacturers have embraced this finish. Baldwin, Emtek, and Nostalgic Warehouse all produce extensive Craftsman-appropriate lines in oil-rubbed bronze. You won’t struggle to find matching pieces.
Applications: Everything coordinates. Door hardware, cabinet pulls, window locks, switch plates, outlet covers, bath accessories — all available in matching oil-rubbed bronze. This makes whole-house consistency achievable without hunting through specialty suppliers for every item.
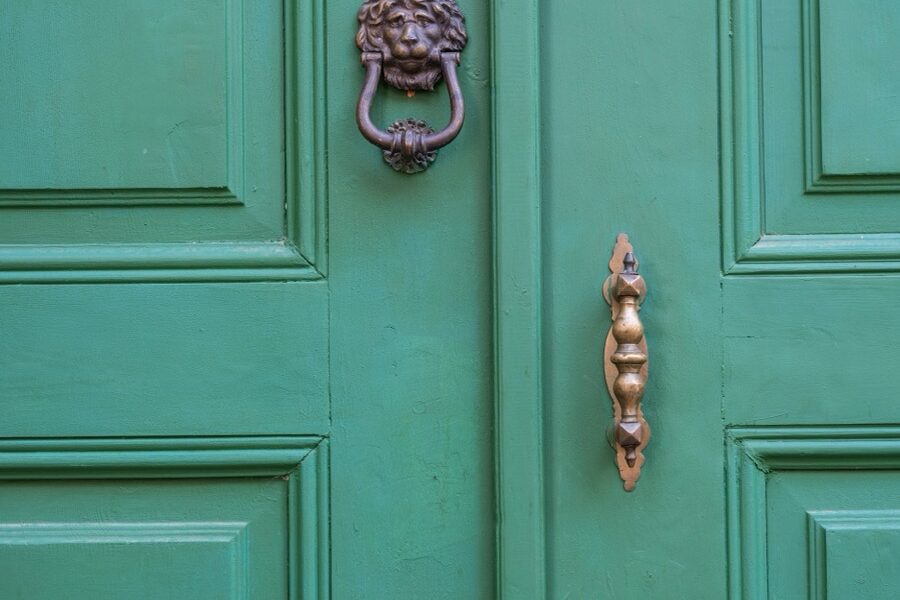
Hammered Copper: The Statement Choice
Where oil-rubbed bronze whispers “Craftsman,” hammered copper announces it. Both are period-appropriate, but copper makes a bolder visual statement:
Visual warmth: Copper’s red-orange glow adds a warmth no other metal matches. In rooms with darker woodwork — deep-stained oak or walnut — copper hardware provides welcome brightness without competing with the wood for attention. It’s complementary rather than contrasting.
Textural interest: Those hammer marks catch light differently across the surface, creating movement and depth that flat metal finishes can’t replicate. This handcrafted look epitomizes what the Arts and Crafts movement was about — you can see the maker’s hand in the material.
Natural aging: Copper oxidizes through brown to eventual verdigris over decades. Some homeowners polish regularly to maintain the bright copper glow; others let patina develop naturally. Both approaches are period-appropriate — there’s no wrong answer, just preference.
Best applications: Copper works especially well for kitchen pot racks, range hoods, cabinet pulls, light fixtures, fireplace screens, and bathroom accessories. Rooms with good natural light activate copper’s color best. In dim rooms, copper can read as just “dark metal” and you lose the effect.
Specific Hardware Recommendations
Entry door sets: Mission-style backplates with square or rectangular shapes. Steer clear of ornate Victorian rosettes — they belong to a different design tradition entirely. Emtek’s Arts and Crafts collection and Nostalgic Warehouse’s Craftsman series both nail the proportions and detail level.
Interior door knobs: Simple round or octagonal knobs in oil-rubbed bronze. Glass knobs appeared in period homes for interior doors and remain appropriate, though they’re less common in authentic Craftsman restorations than they are in Victorian ones.
Hinges: Square-corner hinges, not rounded. This is a detail that’s easy to get wrong because most big-box stores stock round-corner hinges as the default. Ball-tip or steeple-tip finials work; avoid acorn tips, which read Colonial rather than Craftsman.
Cabinet pulls: Simple bail pulls or bin pulls with clean, straight lines. Mission-style pulls feature vertical bars without curves. The moment you add curves, scrollwork, or ornate detailing, you’ve left Craftsman territory.
Cabinet knobs: Square or round, minimal decoration. Pyramid-shaped tops are period-appropriate and add subtle visual interest. Size them to the cabinet — 1″ to 1.25″ for drawers, stepping up for larger doors. Oversized knobs on small drawers look awkward regardless of style.
Switch Plates and Outlet Covers
Probably should have led with this topic, honestly, because it’s the one most people overlook entirely. Switch plates and outlet covers interrupt wall surfaces in every room, and standard white plastic plates in a Craftsman home are like running shoes with a suit:
Metal plates: Oil-rubbed bronze, antique copper, or antique brass plates that coordinate with your door and cabinet hardware. Expect to pay $8-20 per plate versus $1 for plastic, but you’re looking at these every single day. The upgrade is worth it.
Wood plates: Unfinished oak or mahogany plates that can be stained to match your trim. These provide a warmth that metal can’t achieve, but they require more careful installation to avoid splitting.
Push-button switches: For maximum period accuracy, companies like Classic Accents and Rejuvenation sell push-button switch plates that replicate original electric fixtures. They require specialized switches behind them, but the visual effect is striking — visitors always notice these.
Bathroom Hardware Considerations
Bathrooms present specific challenges because humidity and water contact affect hardware differently than dry rooms:
Moisture resistance: Solid copper and bronze handle bathroom humidity well — they were made for wet environments. But be aware that bronze-finished steel (a cheaper alternative) may show wear at edges over time as the finish wears through to the base metal. Spend the extra on solid material for bathroom pieces.
Towel bars and rings: Simple, straight designs with square or rectangular mounting brackets. Curved Victorian-style bars and ornate rosettes belong in a different house. Clean lines, visible mounting hardware, no fuss.
Robe hooks: Mission-style hooks with visible mounting hardware. Double hooks or hooks mounted on wooden backplates add character while staying firmly within the Craftsman design language.
Toilet paper holders: Original Craftsman bathrooms sometimes featured recessed holders built into the tile or wall — a thoughtful detail worth reproducing. Surface-mount options should maintain the same clean-line aesthetic as the rest of your bathroom hardware.
Coordinating Finishes Throughout the Home
Consistency matters in a Craftsman home. Unlike eclectic design styles that celebrate mixing metals, the Craftsman approach favors coherent material choices:
Primary finish: Pick one main finish — oil-rubbed bronze is the most versatile — and use it for door hardware, cabinet pulls, and bathroom accessories throughout the house. This creates the visual continuity that Craftsman interiors depend on.
Accent finish: A secondary finish like copper or antique brass can appear in specific rooms or for specific purposes. Copper in the kitchen, for instance, while the rest of the house runs oil-rubbed bronze. Just keep it intentional rather than random.
Transition spaces: Hallways and stairways should stick with the primary finish to create visual flow between rooms. These are the connective tissue of the house — they should feel neutral rather than drawing attention to themselves.
Exterior coordination: Entry hardware, porch lights, house numbers, and the mailbox should all share the primary finish. This creates the unified curb appeal that makes a Craftsman exterior feel resolved rather than assembled from spare parts.
Quality and Price Considerations
Hardware quality spans an enormous range, and you genuinely get what you pay for in this category:
Solid bronze/copper: The highest cost option and the most authentic in both appearance and feel. Manufacturers like Rocky Mountain Hardware, Sun Valley Bronze, and Arts & Crafts Hardware produce pieces that will look better in 20 years than they do today. This is heirloom-quality hardware.
Bronze/copper plating: Mid-range options from Baldwin, Emtek, and Nostalgic Warehouse. Quality varies — some plated hardware is excellent, some wears noticeably within a few years. Always examine physical samples before committing to whole-house quantities.
Painted finishes: Budget options that approximate the look but may show wear at high-contact points over time. Acceptable for low-traffic applications like closet door knobs or seldom-opened cabinets. Don’t use them for entry doors or daily-use kitchen hardware.
Installation Notes
Proper installation protects your investment and prevents the frustration of stripped screws and cracked wood:
Pre-drilling: Always pre-drill for screws in hardwood. Always. Oak splits easily, and a stripped hole in a door stile is an ugly problem to fix. Use a drill bit slightly smaller than the screw shaft.
Proper sizing: Backset dimensions must match your doors. Standard backset is 2-3/8″ or 2-3/4″ — measure before ordering, because the wrong backset means returning everything.
Cleaning: Skip abrasive cleaners that strip the finish. A soft cloth with mild soap preserves patina while removing everyday grime. The goal is to clean the hardware, not refinish it.
Waxing: Periodic wax application controls how patina develops and protects the underlying finish. Renaissance Wax is the industry standard — museums use it on bronze sculpture, and it works just as well on your door hardware.
Hardware is a relatively small line item compared to woodwork, built-ins, or tile — but it’s what visitors touch and notice first. The right hardware doesn’t just complete the Craftsman look; it makes every interaction with your home feel intentional. And in a Craftsman house, that intentionality is the whole point.


Stay in the loop
Get the latest craftsman charm updates delivered to your inbox.