Plate Rails and Box Beams That Make Dining Rooms Unforgettable
Craftsman dining rooms have gotten complicated with all the reproductions, home-show interpretations, and Pinterest boards floating around. As someone who has spent fifteen years restoring original bungalows from the 1910s, I learned everything there is to know about what actually made those rooms work. Today, I will share it all with you.
The thing nobody tells you about plate rails, box beams, and wainscoting is they were designed as a single system. Pull one element out and the whole composition falls apart. Stick one element in wrong and you get that awkward “renovation” look that bugs me every time I walk into a flip.
The Plate Rail’s Function and Form
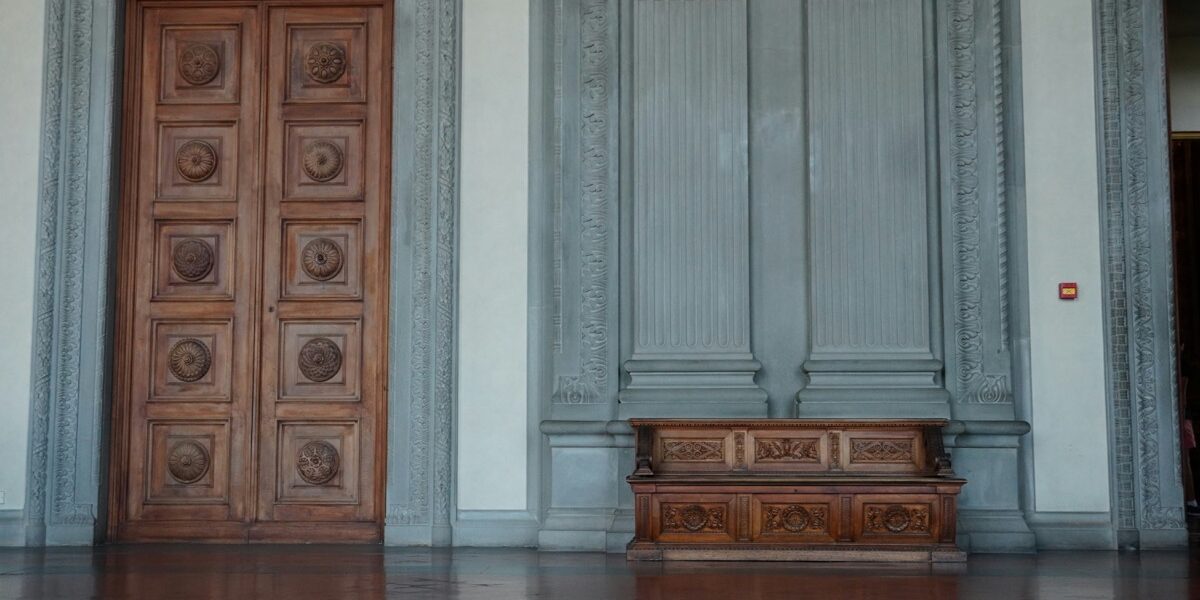
Before built-in china cabinets became standard, families displayed their good dishes on plate rails — narrow shelves mounted high on walls with a small lip to keep everything upright. That practical origin matters because it drove the proportions we still copy today.
As the Craftsman movement took hold, the plate rail evolved from storage into a serious design element. It divides walls into zones: lower wall treatment below, frieze zone above. It provides a natural hanging line for artwork. And it establishes the horizontal rhythm that makes a whole room feel intentional rather than thrown together.
Standard placement falls between 60 and 72 inches from the floor, roughly eye level for a standing adult. I’ve found 66 inches hits the sweet spot in most dining rooms with 9-foot ceilings. Go lower in rooms with 8-foot ceilings or the upper zone looks pinched.
Construction includes a flat shelf (3 to 5 inches deep), a groove or lip for plates, and supporting brackets. The shelf needs to project enough for display without becoming a hazard. I cracked my head on one in a client’s house in Portland that stuck out eight inches. That was too far.
Making Plate Rails Work With Your Walls
A plate rail in isolation looks stuck-on. It needs companions.
Below the rail, wainscoting or paneling should run from baseboard up. This lower zone typically runs taller in dining rooms than anywhere else in the house, reflecting the room’s ceremonial status in a 1910s household. Forty-eight to 60 inches was typical for the paneled zone.
Above the rail, the wall changes character. Plaster, paint, or wallpaper distinguishes this frieze zone from the wood-intensive lower section. The contrast between wood below and simpler treatment above is what creates the layered feeling people associate with Craftsman interiors.
Probably should have led with this section, honestly. The proportional relationships matter more than any individual detail. The rail height should align with door heads, window heads, and beam soffits. When those lines sync up, the room clicks. When they don’t, something feels off even if you can’t identify why.
Box Beams: Why Hollow Beats Solid
Box beams are hollow rectangular structures built to look like solid timber. They bring the ceiling plane down visually, make tall rooms feel intimate, and establish grid patterns that organize the space overhead.
The construction is straightforward: dimensional lumber wrapped with finish boards to form a hollow rectangle, attached to standard ceiling joists. No structural engineering required. This is trim carpentry, not framing, though you wouldn’t know it looking at a well-executed installation.
Scale is where people go wrong. For 10-foot ceilings, beams 8 to 12 inches deep and 6 to 10 inches wide provide appropriate visual weight. Drop those proportions for standard 8-foot ceilings — a 6-inch deep beam works where a 10-inch beam would feel oppressive. I measured beams in about forty original bungalows before I started trusting my eye on proportions.
Pattern options range from simple parallel beams to perpendicular grids that highlight specific zones. The dining table typically centers within a beam bay. That’s what makes box beams endearing to us old-house people — they organize furniture placement architecturally rather than leaving it to chance.
Details That Separate Good From Obvious
The beam’s underside matters more than most people realize. Flat bottoms are simplest. Panel details add interest. Slight chamfers or reveals create shadow lines that read as mass from below.
Where beams meet walls, other beams, or ceiling areas, the transitions need to look intentional. Corbels, bearing plates, or simple returns provide finished connections. A beam that just dies into drywall screams “afterthought.”
Finish should match or complement the room’s other woodwork. Stained beams against painted ceilings create drama. Painted beams against painted ceilings create subtler texture. Both approaches have historical precedent, so neither is more “correct.” Pick what serves the room.
Wainscoting Below the Rail
Quarter-sawn oak was the premium material for visible wainscoting. Douglas fir served more modest budgets. Painted wainscoting used whatever species hid best beneath paint.
Panel patterns — raised panels, flat panels, or board-and-batten — should relate to door and trim styles already in the room. Mixing panel profiles between wainscoting and doors creates visual noise that undermines the whole composition. I’ve seen otherwise beautiful restorations ruined by a mismatched panel detail.
Some installations included a distinct chair rail at lower height within the paneled zone. Others used the plate rail as the only horizontal break. Both approaches appeared in original houses, so you have legitimate flexibility here.
Putting the System Together
Where box beams meet walls, the intersection should relate to the plate rail and paneling below. Beams landing on the rail create strong vertical emphasis. Beams landing between panels maintain rhythmic continuity.
All the horizontal lines — plate rails, picture molding, chair rails, beam soffits — create bands across the walls. Their spacing needs to feel deliberate. Mathematical relationships between these bands create visual comfort that random spacing cannot. This isn’t subjective. Rooms where the proportions align just feel right, and rooms where they don’t feel off, regardless of how expensive the materials are.
Material continuity ties everything together. All wood elements need to look like they belong to the same family. Mismatched species, stain colors, or finish sheens break the unity that makes Craftsman rooms work. I’ve walked into dining rooms with six different wood tones happening simultaneously. They spent a fortune on materials and got chaos.
Retrofitting Existing Homes
Standard 8-foot ceilings leave limited room for box beams. Lower beam profiles (6 inches versus 10) suit the proportions. You can still get the grid effect; you just need to accept smaller visual mass.
Adding plate rails to existing walls means dealing with doors, windows, and outlets. Running continuous rails around window frames requires transitions that look awkward without careful design. Sometimes interrupting the rail at windows actually looks cleaner than forcing a wrap-around.
New Craftsman elements should match the house’s existing scale. Heavy beam treatment in a modest house feels like costume jewelry. Appropriately scaled elements integrate more successfully, even if they’re less dramatic on Instagram.
Finish Choices and Aging
Stained and clear-finished quarter-sawn oak was the premium Craftsman choice. The distinctive ray fleck pattern provided visual interest without applied decoration. Not every house got this treatment, though. Painted woodwork in period-appropriate colors — soft greens, cream whites, warm grays — appeared in plenty of original homes.
Natural finishes darken with age and sun exposure. This patina is part of Craftsman character, not a defect. Trying to match new wood to 100-year-old wood is a fool’s errand. Either embrace the difference or refinish everything together. There’s no middle ground that looks good.
What These Elements Cost
Professional box beam installation runs $200 to $600 per linear foot depending on complexity. A typical dining room needs 50 to 100 linear feet for a meaningful grid. Plate rail installation ranges from $75 to $200 per linear foot including brackets and shelf. Wall paneling costs $15 to $40 per square foot installed.
Complete Craftsman dining room treatment adds up fast. A phased approach works: beams first, then plate rail, then wainscoting. Each phase improves the room incrementally while building toward the full composition.
Plate rails and box beams transformed Craftsman dining rooms from ordinary spaces into rooms worth gathering in. These elements are not decoration applied to walls and ceilings. They are the architectural framework that gives a room its character. Get the proportions right, match your materials, and the room will feel designed rather than decorated. That distinction matters more than any individual detail choice you’ll make.


Stay in the loop
Get the latest wildlife research and conservation news delivered to your inbox.