Why Craftsman Porch Ceilings Peel Differently Than Walls
Craftsman porch ceiling peeling has gotten complicated with all the bad advice flying around. As someone who has stood on a ladder in 95-degree humidity watching paint flakes fall into my coffee, I learned everything there is to know about this specific, maddening problem. Today, I will share it all with you.
You’ve probably already scraped this ceiling twice. It came back. That’s not laziness — that’s geometry and moisture chemistry working against you from the start.
Horizontal tongue-and-groove ceilings trap humidity in ways vertical surfaces simply don’t. Water vapor rises from the porch floor, from beneath the house, from rain blowing sideways under the eaves. It hits that bead board and just sits there. Every groove becomes a tiny capillary tube pulling moisture upward. Meanwhile, the sun heats the ceiling surface — we’re talking 70 degrees at night, 110 on the painted surface by afternoon. Wood fibers expand, contract, expand again. Paint film that was fine in spring starts failing by July.
Then there’s the paint history underneath. Most Craftsman homes built before 1970 have multiple layers of oil-based paint already down there. Oil doesn’t bond to itself the way latex does. Slap latex over old oil enamel and you’re essentially gluing something hydrophilic to something hydrophobic — like taping a wet cloth to glass with dry adhesive. Humidity gets behind the new latex, finds that slick oil layer, and separation is basically inevitable.
Add driving rain migrating sideways into flashing gaps and you’ve got a moisture trap sealed by failed adhesion. Not a paint problem. A moisture-and-adhesion problem that a fresh coat of paint absolutely won’t fix.
Find the Real Cause Before You Touch a Scraper
But what is porch ceiling peeling, really? In essence, it’s a failure of adhesion between paint layers and wood. But it’s much more than that — three distinct failure types present differently, and treating the wrong one wastes an entire weekend.
Moisture Rising From Below — Bubbling Paint
Paint bubbles like blisters forming on skin. They appear while paint is still wet or shortly after application. This signals moisture vapor pressure pushing the film away from the wood. The wood surface itself might feel dry — the water is coming from underneath. Subfloor moisture. High ambient humidity. Poor porch ventilation. Bubbles mean primer failed to seal the wood before the topcoat went on. Full stop.
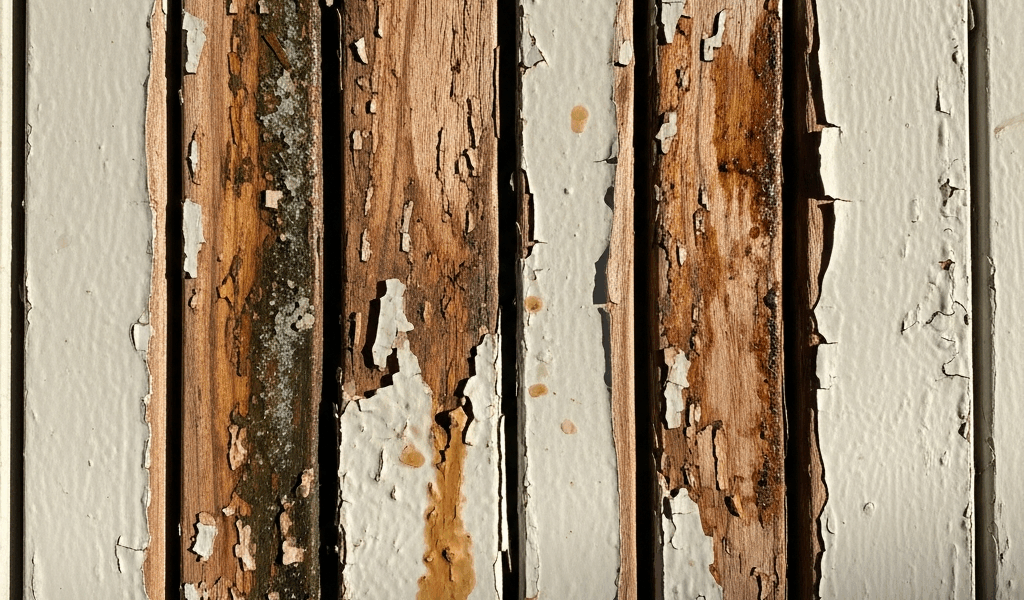
Failed Adhesion Between Old Oil and New Latex — Edge Lifting
Paint curls and lifts at edges first. Peels back in sheets, almost satisfyingly. Textbook latex-over-oil failure — the topcoat simply won’t stick. You’ll see it happen fastest where water finds any crack or seam. Around porch posts, at nail heads, along bead-board gaps. The original paint layer underneath is often perfectly intact. The new layer just gave up.
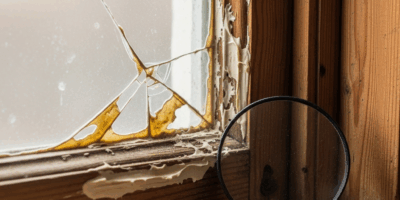
Rain Infiltration From Above — Patchy Flaking
Paint fails in specific locations rather than uniformly. Peeling concentrated under one section of roof, or along a particular rafter run. This points upward — flashing failure, shingle damage, water coming down rather than rising up.
Grab a moisture meter — Extech makes solid ones for around $25 — and test both the wood surface and the air underneath that ceiling. High readings throughout tell you ventilation is the long-term fix. High readings only in isolated spots, go check your roof first.
What You Need and What to Test First
Probably should have opened with this section, honestly. But I wanted you thinking like a diagnostician before handing you a scraper.
Lead paint testing comes first if your house predates 1978. Home Depot carries 3M LeadCheck test kits for $8 per kit — buy two or three. This isn’t about legal liability. Lead dust when you’re scraping overhead is a genuine health hazard, and a test kit takes sixty seconds to use. If results come back positive, get a HEPA-filter shop vac. Rent one for $40 a day if you’d rather not own one. Cheap compared to what comes after ignoring it.
Tools you’ll actually use:
- Paint scraper — stiff 2-inch putty knife, not a flexible one. Bahco and Strybuc hold edges far longer than generic alternatives
- Moisture meter — worth owning permanently after this job
- Trisodium phosphate (TSP) or TSP substitute like Dirtex for cleaning
- Shellac-based primer — Zinsser BIN is the standard, around $35 per quart
- Exterior-rated paint with mildewcide, satin or semi-gloss sheen only
- Angled brush for bead-board grooves, quality synthetic bristles
- Roller frame and 3/8-inch nap roller for flat sections
Primer choice matters more than paint brand here. Shellac-based or oil-based primer bonds mechanically to old oil paint. Latex primer doesn’t — not reliably. Zinsser BIN dries in two hours and has almost no odor compared to oil primer. That’s why it’s worth the $7 premium. You’re not being precious about materials. You’re fixing the exact adhesion failure that caused the problem in the first place. Don’t make my mistake of grabbing cheap latex primer because it was on the shelf.
I’m apparently sensitive to oil primer fumes and Zinsser BIN works for me while oil-based primer never did in enclosed spaces. Personal quirk, but worth knowing.
Exterior-rated paint only — interior paint fails on horizontal surfaces exposed to any weather. Sherwin-Williams ProClassic Exterior or Benjamin Moore Exterior are mid-range reliable. Behr Marquee Exterior runs cheaper and honestly performs equally well on porch ceilings. Add mildewcide separately if the paint doesn’t already include it.
Step-by-Step Repair Process That Actually Holds
So, without further ado, let’s dive in. The actual work is methodical once you have a clear diagnosis and moisture readings in hand.
Scrape completely. Remove all loose paint. Feather the edges where old paint meets bare wood — tapered edges disappear under topcoat, while sharp edges cast visible shadows and show through forever. A 2-inch scraper with moderate pressure beats aggressive scraping that gouges into the wood grain.
Clean the ceiling. TSP or Dirtex removes weathering, mildew, and surface oxidation that primer simply won’t stick to. Mix according to package directions. Scrub with a soft deck brush. Rinse thoroughly. Let it dry twenty-four hours in low humidity — run a shop fan underneath to speed this up if you’re working against a weather window.
Spot-prime all bare wood. Zinsser BIN technically works on slightly damp wood, but wait for genuinely dry conditions regardless. One coat on bare spots is enough. Primer seals. That’s the whole job.
Prime the whole ceiling if you scraped more than 25 percent of the surface. 3/8-inch nap roller on flat sections. Angled brush into every bead-board groove. Thin coats on horizontal surfaces — heavy primer sags and drips and you’ll spend an hour fixing runs. Two thin coats over two days beats one thick coat every time.
Topcoat. Same approach. Thin coats. Satin or semi-gloss sheen — never flat on a porch ceiling. Flat paint traps moisture against the surface. Satin sheds it. Semi-gloss even more so. Let BIN primer cure fully before topcoating — the can says two to four hours, but four is better than two.
In humid climates, add six hours between coats instead of the printed minimum. That’s what makes patience endearing to us DIYers working in coastal or Southern climates. Rushing dry times is how you end up back on that ladder next summer.
How to Stop It From Peeling Again Next Season
Paint isn’t the fix. Paint is the symptom showing up where the real problems live.
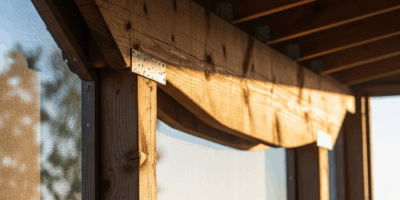
Check porch roof flashing where it meets the house band board. Gaps there let water migrate sideways into the structure quietly, all winter. Silicone sealant rated for exterior use costs $6 a tube. Five minutes of work. That one thing does more for your ceiling than any paint product will.
Ventilation matters more than most people expect. Fully enclosed porch undersides trap moisture with nowhere to move. Open soffits, add ridge vents, or put a small battery-powered vent fan on the porch rim board. Moving air stops condensation. Stagnant air is where peeling starts — every single time.
On sheen and color: satin or semi-gloss regardless of what color you choose. But while you’re at it — consider Haint Blue. It’s a pale blue traditional to Southern Craftsman homes. Sherwin-Williams Rainwashed or Benjamin Moore Palladian Blue are both close matches. Originally meant to ward off spirits, which is a great story. Practically, it repels wasps and certain biting insects because they perceive it as open sky. That’s a documented, real benefit on a porch ceiling. And aesthetically, Haint Blue on a Craftsman porch looks completely intentional — not like a paint decision made out of desperation on a Saturday morning.
Plan for repainting every four to six years on a porch ceiling. Not the seven to ten years vertical surfaces get. Accept this now. Horizontal exterior wood is harder to maintain — that’s just what it is. Money and time spent on proper flashing and ventilation now is what pushes that four-year timeline closer to six. That’s the actual leverage point.


Stay in the loop
Get the latest craftsman charm updates delivered to your inbox.